|
I'll be posting some random thoughts here about my photography: my travel plans, technical information behind some images, stories about how certain pictures were captured, etc. The timing of the postings will also be random as my priority is capturing new images rather than writing about existing ones. I hope you will feel free to comment on any of my postings and I appreciate you taking time to read my entries.

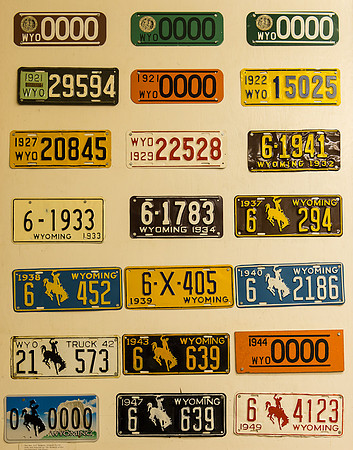
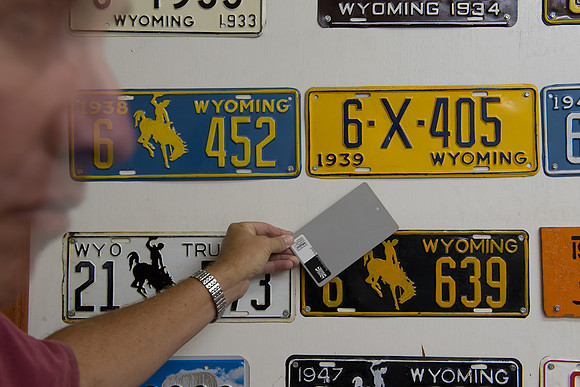
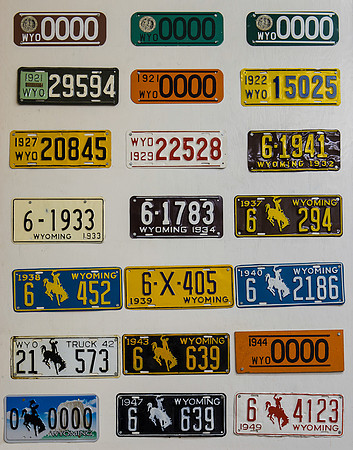
White BalanceEvery so often, the auto white balance setting on the camera does not render the colors as accurately as I would like under challenging lighting conditions. This was the case while I was shooting license plates at the historic Wyoming Frontier Prison in Rawlins. The color of the original image was far too yellow. The wall behind the license plates was white.
Sometimes It Pays to Do the ResearchWhen taking trips to the national parks, I like to plan some of my photos shoots. I do some internet research of the location and usually purchase a photography book specific to the park. For my most recent trip to Yellowstone, I purchased Gustav Verderber's "Photographing Yellowstone National Park: Where to Find Perfect Shots and How to Take Them". This is one in a series of books that covers several national parks. I've used these books for Death Valley, Great Smoky Mountains, Everglades and Glacier National Parks as well. I found Verderber's book for Yellowstone to be particularly helpful. He advises the photographer to "be at Artist Point Overlook on a clear morning at precisely 9:45 am. At that exact moment, the cloud of mist at the bottom of the falls turns luminous as though lit from within by the northern lights...by 9:55, the mist at the foot of the Lower Falls has become a complete, shimmering rainbow!" He also provides time spans for the rainbow from some other vantage points including Uncle Tom's Overlook and Lookout Point. Using this information, I positioned myself at the Artist Point Overlook one morning and the Lookout Point the next morning at the recommended times. As promised, the rainbow arrived right on schedule!
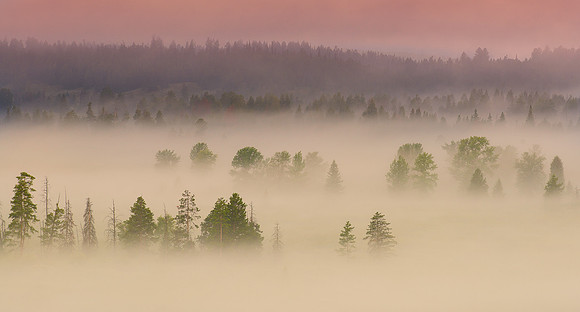
Take What They Give YouThree times, I drove to the Jackson Lake Lodge and hiked the Lunch Tree Hill trail behind the lodge in hopes of capturing a nice panoramic photograph of Jackson Lake and the Willow Flats in front of the Grand Teton mountain range. The first time, I got so caught up in shooting at Oxbow Bend that I didn't catch the magic light for the panoramic. The following morning, I arrived at 5:15 am, hiked to the vantage point and patiently waited for nearly two hours in the rain--although I did capture one photograph when the sun lit the mountains for about five minutes. For the third morning, the weather forecast was for clear skies with a zero percent chance of precipitation. Although I was hoping for some clouds to add drama to the sky, I was relieved that at least I could expect to get a sharp image in the early morning light. As I approached the lodge, I became alarmed to see that although the skies were clear, a thick fog made it impossible to see the lake or the mountains! I assumed that the fog would eventually lift--and prepared to wait it out. Quite some time passed and the fog wasn't going anywhere. So, I started shooting photos of trees in the early morning fog. Although I didn't get the pictures that I intended, I walked away with some photos that I liked just as much, or more. This happened on several occasions during the trip. I refer to these situations as "take what they give you."
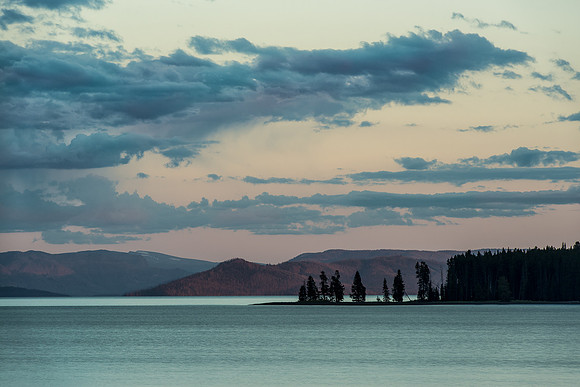
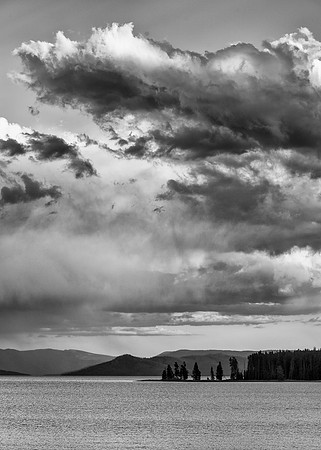
Then and Now...There is something about this view of Yellowstone Lake that really appeals to me. I think the appeal is how the layers of the land and the various shades of blue add depth to the photograph. The clouds are just as, or more, of an important element to the image.
Back in the days of film, the only EXIF or GPS information was what I happened to write on the slide mount! All I remembered was that this picture was taken at Yellowstone Lake. When I planned this most recent trip to Yellowstone, I hoped to revisit this scene, but had no idea where it was as Yellowstone Lake is very large. While driving from the Grant Village campground to Fishing Bridge, I recognized this scene from the road. Driving east, it was just a short distance past the Bay Bridge campground and the Gull Point Drive. There is a pullout on the lake side of the road, and I stopped for some photos. Actually, I liked the scene so much that I stopped on three different occasions (two sunrises and a sunset). Below is one of the images from my recent trip that closely matches the perspective of the older shot. I was amazed that the treeline hasn't changed very much in all those years.
The One That Got AwayWhile visiting Yellowstone, I had my heart set on capturing a certain image. That image is the Lion Geyser erupting with the Heart Spring in the foreground. The image isn't easy to come by. The Lion Geyser's eruptions are unpredictable. And, the lighting is always hit or miss in the Upper Geyser Basin.
One morning, I was up and out early and walking the Upper Geyser boardwalk at 5:30 AM. To my amazement, the Lion Geyser erupted while I was standing right next to it! Unfortunately, the sun had not yet risen--so it wasn't the best for the photography. But, it was an amazing experience standing so close to the geyser as it erupted 80 plus feet into the air!
A little later, I walked back to the Inn for breakfast. The ranger told me that Lion Geyser had not erupted at all the day before. But, that if I saw it erupt at 5:30 AM, it was likely that it would erupt every 60-90 minutes for much of the day.
I returned to the Lion Geyser after breakfast. But, as I was approaching it, I noticed a large group of people running for the unpredictable Beehive Geyser. Apparently, it was giving indications that it was about to go. So, I rushed to get into position for that eruption--making sure to stay well away from the spray (which does a number on lenses).
To my great disappointment, while I was shooting Beehive Geyser, Lion erupted in the background! So, when I was done shooting Beehive, I went back to Lion and figured I would wait for the next eruption. The lighting was beautiful at the time.
60 minutes passed...the 90....then 120...then 150 minutes. I became impatient. A passing ranger pointed out that it was very likely that the three or four eruptions that morning had probably completed its cycle. It might not erupt for another couple of days.
So, I never did get the shot that I envisioned. But, I walked away with a Beehive eruption photo as another consolation prize.
The One That Got Away (Heart Spring with Lion Geyser...envision it with an 80 foot eruption)
 
Beehive Geyser (the consolation prize)

$150 per National Park!I recently returned from a 22 day trip to four sensational national parks. Click here to view my daily itinerary. I was pleasantly surprised to see that the total cost of the trip (including round trip transportation from Chicago), amounted to just over $600! Here's the cost breakdown: Gas ($350)...the trip covered $5,500 miles. The Prius averaged 52 mpg for the trip--106 gallons. The average cost for a gallon of gas was $3.45. Lodging ($200)...the trip covered 21 nights of Prius camping. Nine nights were free. Twelve nights averaged $16 per night. Food ($0)...I did not allocate any cost for food as the total expense during the trip amounted to less than if I had stayed home. Most of the food for the trip was purchased in advance from Costco. While in the national parks, I ate in the cafeterias for most dinners and some breakfasts, but the cost of those meals was no more than what I would ordinarily spend at home. No incremental cost. Ice ($35)...keeping food cold was an ongoing expense. Ice was purchased for about 18 of the days at an average of $2 per bag. Entertainment ($45)...my trip included three tours. 1 hour tour of the Wyoming Frontier Prison, 1 hour tour of the Chateau de Mores, and a 2 hour Many Glacier boat tour. Most of my "entertainment" was photography related--and I already own that equipment. I already own a pass for the national parks, so there were no entrance fees. Total Cost ($630)...the total cost of the 22 day trip amount to just over $600! This excludes the cost of the 24-70 lens that now resides in a valley in Glacier National Park. The bottom line is that the trip was less expensive than if I had stayed home. Seventeen Sunrises in Amazing Scenery...Priceless! Click here to view the photos from the trip. Itinerary--National Parks 22 DaysFollowing was my itinerary for my recent trip to four sensational national parks. I left Orland Park (a southwest suburb of Chicago) on July 17th and returned home on August 7th. Following is a list of my nightly stops throughout the trip:
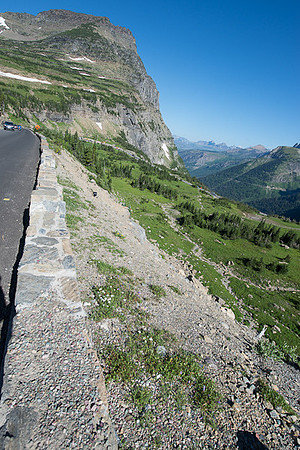
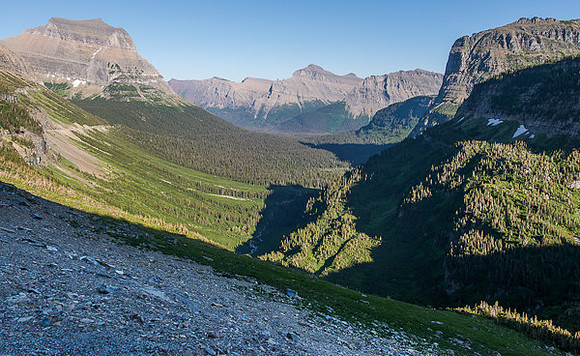
Click here to view the photos from the trip. I Left My Lens (not my heart) in Glacier (not in San Francisco)...During my recent trip to Glacier National Park, I suffered the largest property loss of my lifetime. My Nikon 24-70 2.8 lens now resides in a valley thousands of feet below Logan Pass. While parked at the visitor center at Logan Pass, I decided to walk a short distance along the historic "Going-to-the-Sun" road. A roadside waterfall had captured my attention. I tossed my backpack over my shoulders and began walking. Before I reached the falls, I noticed another scene that appealed to me. It was a large, bare granite mountain peak with a forest of trees along its base. However, I didn't want to set my tripod up on the narrow road. And, there was only a small amount of stable ground to the side of the road. Eventually, I found a small area on the valley side of the roadside barrier where I could safely stand:
As sickening as this whole experience was, I had some fortunate events that helped to offset most of it:
Although I realized that the lens could never have survived such a fall, I hiked down into the valley on three occasions to search for it. I thought it might be helpful for insurance purposes if I could produce more solid evidence that the lens was damaged. I was also curious to see the extent of the damage. However, I never found the lens. It was probably lodged in some rocks or vegetation. So, if you are ever in Glacier National Park, take a look around the valley by Logan Pass and you might just find a Nikon 24-70 lens! UPDATE (August 20, 2012): My insurance company reimbursed me for the original cost of the lens ($1,550). Prius Camping- New & ImprovedEarlier this year, I posted a blog entry about my experiences with Prius camping. Since then, I've become much more experienced at camping in my Prius. Recently, I completed a 21 day trip to four national parks. I camped in the Prius for all 21 of those nights. I've received numerous questions about Prius camping which I'll try to address in this posting. Cost The obvious advantage to using the Prius rather than a more traditional RV is the lower cost of fuel. For most people, a larger savings is the lower cost of lodging (see campgrounds section below). During my recent trip, my Prius averaged an overall 54.0 mpg for the 5,500 mile journey. In Yellowstone National Park, the slower speed limits enabled the Prius to improve its gas mileage to nearly 63 mpg!
An equally, if not more, important benefit is the convenience that Prius camping provides to outdoor photographers. In Yellowstone, the sun rises at 6:00 am in July and doesn't set until 9:00 pm. I usually arrive at the location by 5:15 am to set up and to capture some shots before the sun rises. Often times, these locations are 30 minutes or more from the nearest lodging. With the Prius, I am often situated just minutes away! During this last trip, I experienced 17 consecutive sunrises. During the trip, there were a few occasions when the campgrounds were full when I arrived. Having the flexibility to sleep in the Prius provided an easy solution to this problem (more on this later in the "Campgrounds" section below). Comfort Comfort probably isn't the first thing that comes to mind when you think about sleeping in the car! However, I'm rather tall (6'3") and find the Prius to be quite comfortable for sleeping. To create the most room, I slide the front passenger seat all the way forward toward the dashboard and then push the seat back until it touches the back seat. Then, I push the back passenger seat down until touches the front seat. I use two floor pillows to flatten things out in the area where the back seat meets the front seat. This creates a flat space that is nearly nine feet long!
Initially, I planned to stay at Hampton Inns (my usual lodging choice) while outside of the national parks. But, the thought of checking in and carrying many of my things to/from the car seemed like a hassle--especially considering that I would only be at the hotel for about 6 or 7 hours! Instead, I opted for continuing to "sleep in my own bed." In fact, I actually slept better in my Prius throughout the trip than I do at home. Although, I'm not sure how much the 4:45 am wake up times impacted that! Temperature Control Another surprising benefit of the Prius is that you can control the cabin temperature during the evening. This is possible because the hybrid battery, rather than the gas engine, supplies most of the power. When the battery runs low, the gas engine kicks on for a few minutes to regenerate the battery. When the battery is charged the gas engine turns off. During this trip, I only used this feature once--and that was because the temperatures were too high in North Platte, Nebraska (90 and humid)! So, I set the cabin temperature to 72 degrees for that night. In Yellowstone, the temperatures were in the upper 30's at night. Yet, it was warm enough inside the car--especially with the sleeping bag (which is rated for zero degree temperatures). During past trips, I found it necessary to turn the heat on once the outside temperatures dropped into the mid-20's. For this trip, I purchased a portable carbon monoxide alarm--just in case the gas engine didn't turn off as it should and carbon monoxide were to become a problem. Campgrounds During the vast majority of the trip, I parked the Prius in formal campgrounds. In Grand Teton National Park, I stayed at Gros Ventre and Colter Bay campgrounds for two nights each. In Yellowstone, I camped at Grant Village and Bridge Bay for two nights each. During some nights, the Yellowstone campgrounds were full. So, one night I "camped" behind the Old Faithful Inn. This was advantageous as there are no campgrounds within 15 miles of Old Faithful. Yet, I was able to practically see the geyser from my Prius. This made it much easier to be out on the trail capturing photos at 5:15 AM. Here is an image of the Prius parked at the back of the parking lot at the Old Faithful Inn:
At each of these locations, there were plenty of other campers in the lot. Here's my Prius RV at Walmart:
In some ways, the Prius offers more security than other forms of camping. In Yellowstone and Glacier National Park, campers are required to store all food in bear boxes--as bears were visiting the campgrounds at night. Sleeping in a hard vehicle certainly offered more peace of mind with grizzly bears roaming nearby! In general, it's more secure to camp in established campgrounds. When staying in areas outside of formal campgrounds (such as the parking lots at Walmart or other visitor centers and lodges), it's best to camp in a larger group (as the photo above illustrates). I also keep the windows closed and covered, the doors locked and the alarm system activated. For this trip, I purchased some custom window coverings from the store at the Prius Chat website. They attach very quickly and precisely to the windows with suction cups. The window covers provide privacy and keep the interior of the car very dark. I sometimes used the window coverings to darken the car while uploading pictures from my storage cards to my laptop in the middle of the day! Showers In most private campgrounds, restrooms and showers are available to the guests. However, there were times during this trip that I parked on consecutive nights outside of formal campgrounds or in primitive campgrounds without showers. In the national parks, a listing of available shower facilities is usually available at the entrance gate. Many times, there are public shower facilities within the national park. The Grant Village shower facility in Yellowstone charged $3.50 for a shower, for example. Or, some private campgrounds offer showers for a fee. I haven't tried any of the public shower facilities outside of the parks as I rarely go two nights in a row outside of established campgrounds with showers. However, I understand that several truck stops offer showers for about $7.00. The Grant Village shower facility is immaculate. The employees clearly take pride in keeping the facility very clean...and the guests responded accordingly by taking extra care to keep things clean. When not staying in a formal campground, I stop at a rest area or a visitor center to use the restrooms for brushing my teeth. If a visitor center isn't convenient, I keep a large bottle of water in my car and use that water to brush my teeth. Power One issue with car camping is that there are so many items with batteries that need to be recharged (camera, laptop, etc.). In the hotel, I usually charge batteries at night. To address this issue, I purchased a power inverter from Costco for about $40. This adapter plugs into the car to provide a power outlet. While driving, I recharge batteries for my camera, electric toothbrush and razor, laptop, phone, iPad, etc. Accessories Those who have camped before will probably already own many of the camping accessories. The amount of items somewhat depends upon the length of the trip and whether you plan to cook or not. Here is a list of items that I brought on my trip. I quickly discovered that it is far more efficient to place each item in the same location within the car throughout the trip. It makes it much easier to locate things and makes the whole experience far less frustrating. So, I will also list where the item was stored. Sleeping
Eating
Photography
Cleanliness
Power
Clothes
Security
Entertainment
Secret Storage in trunk near spare tire
There are many advantages to Prius camping. Clearly, there are also some disadvantages. There is limited space, so Prius camping is most likely limited to solo travelers. The limited space also means that you probably won't want to spend more time than you have to in the vehicle. This wasn't an issue during my last trip as the sunset was a 9:00 pm and the sunrise at 6:00 am. But, during my trip before this one, the sun was setting at 6:00 pm and not rising until 7:30 am--and that's a lot of time to kill outside in the dark! Another disadvantage is that the Prius is a low clearance vehicle. This makes it difficult to leave the main roads. My Prius suffered some damage (scratches) while navigating the dirt road down to Schwabachers Landing in Grand Teton National Park. Then again, a large RV is even more limited in this regard. Maybe this renovation is in my future? :)
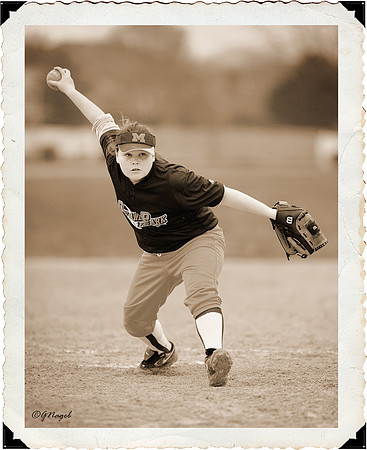
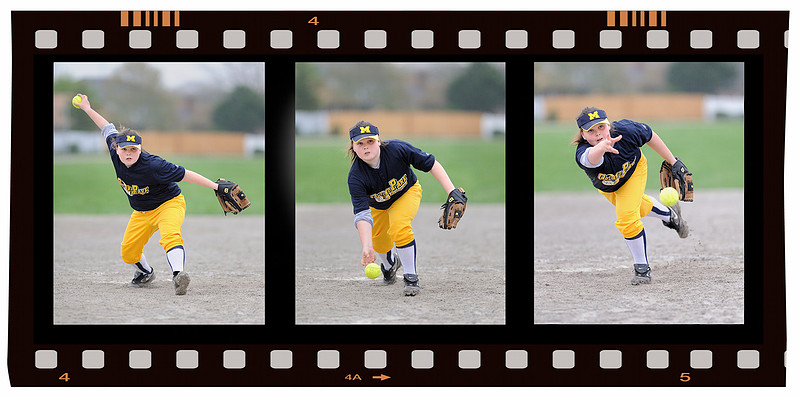
Practice Makes PerfectCapturing peak action shots during sporting events requires good access and great timing. When covering youth sports, its usually important to capture action shots of several different players on the field. The chances of capturing action shots of a wide variety of players during a game are remote--especially with very young players. One method I use to get action shots of more players is to take them during practice. If I'm provided with access to the field, I will take several images of players during the warm ups before the game and also between each inning. This photograph of a softball pitcher was taken while she was warming up between innings. I was positioned right next to the catcher for this image. I used a shutter speed of 1/1250th of a second to freeze the action and a very wide aperture (f/2) to isolate the pitcher by blurring the background. I had to boost my ISO setting to 1600 given the early evening lighting. I took care to shoot from a vantage point that would not include players standing in the background--which would have given information to the viewer that this was a practice pitch.
Ultimately, I used three frames of a sequence to create the following image in Photoshop:
|