|
I'll be posting some random thoughts here about my photography: my travel plans, technical information behind some images, stories about how certain pictures were captured, etc. The timing of the postings will also be random as my priority is capturing new images rather than writing about existing ones. I hope you will feel free to comment on any of my postings and I appreciate you taking time to read my entries.

The S-CurveWhen studying composition, there are many "rules" or guidelines to consider to strengthen an image. Concepts include the rule of thirds, symmetry, leading lines, etc. The S-curve can also introduce a strong element of composition in a frame. Recently, I read one reference that described the S-curve as "compositional gold". Some say that the S-curve is one of the only geometrical shapes that can stand alone as a main subject. You never know when you'll come across a S-curve while shooting. Recently, I happened to notice one in an unlikely place--the interior of the Michigan State Capitol building. I think the S-curve significantly strengthened the composition of this photograph:
Front or Back?The San Francisco de Asis Mission Church in Ranchos de Taos is one of those rare buildings that is most often photographed from the back of the building. Oddly enough, the back of the church is what faces the main road. Since construction of the church began in 1772, I guess it's possible that there wasn't a road behind the church at that time! When I arrived at the church early in the day, I was disappointed to see that the back of the church was backlit. I was having trouble envisioning a decent composition--probably because the colors were completely washed out by the bright light shining in my face. Reluctantly, I worked my way to the front of the building. I was pleasantly surprised by the appearance of the front of the church. After waiting nearly 30 minutes for a car that was parked right in front of the church to move, I captured the following image:
My hotel room in Santa Fe was about a 130 mile round trip drive from this church, so I had no intention of returning to capture any pictures from the back of the church. However, I ended up spending about three hours taking photographs at the Taos Pueblo, which is located only 10 miles or so from this church. That gave me the opportunity to stop by the church one last time during the late afternoon before driving back to Santa Fe for the night. When I arrived back at the church about an hour before sunset, the back of the building took on an entirely different look from earlier that day. Composing interesting photographs became quite easy. Here is my favorite image from the shoot:
Time of DaySerious photographers understand the importance of arriving at a location at the appropriate time of day to capture the intended photograph. This was never more evident than during my recent visit to Santa Fe. While walking through the historic downtown area, I stopped by the Inn & Spa at Loretto several times. Each time, the building took on a new appearance due to the angle of the sunlight at different times of the day. For me, the least desirable picture was the one I captured just before noon. The contrast is greatest at that time with darker shadows (which isn't necessarily a bad thing):
The best way to capture this kind of lighting is to arrive at dusk--just before sunrise or after sunset. Since I was not going to be in Santa Fe that night, my only chance was to arrive at the location about 20 minutes before sunrise. For the best results, it's best to shoot before the sun is in the sky. But, it is also important that there is some light in the sky. Otherwise, the sky goes black and more detail is lost in the building.
The Challenges of a Winter Photo ShootThe Chicago area experienced a significant snow storm on March 5th, so I decided to go out and capture some photographs before all the snow melted. My plan was to visit some local sites and to concentrate on some scenes from the Cook County Forest Preserves.
Things got off to a very bad start with this photo shoot. My first destination was the Cherry Hills Woods picnic area. But, the parking lot was closed as the area was not plowed. Fortunately, the parking lot at Horsetail Lake was open. Horsetail Lake is only about 1/2 mile from Cherry Hills Woods, so I parked there and started to walk. Walking along the road with snow almost up to my knees in sections was not easy!
Along the way, I stopped to take this photo from just off the side of the road:
 
Initially, my 70-200 was attached to my camera. I realized that I wanted my 24-70 instead, so I carefully laid my camera bag on top of the snow and opened it. Next, I placed the 70-200 down on the bag and reached for the 24-70. My plan was to switch the back lens cap from the 24-70 to the 70-200 and then attached the 24-70 to my waiting camera.
Just at that moment, a plow came speeding down the two lane highway going at least 40 mph. Before I realized what was happening, a wall of slush and ice slammed into my entire body--practically knocking me over! I looked down to see my open camera bag filled with snow--and my uncovered 70-200 was covered with ice! This reminded me of an experience I had a few years ago at Baker Beach in San Francisco when a wave crashed into me and nearly destroyed all of my gear.
Fortunately, I had my back to the plow or my D800 would have been filled with snow! Things could have been worse...I was able to clean my 70-200 and get everything dried out after the shoot.
I doubt that these photos were worth it, but here are a few from the shoot:


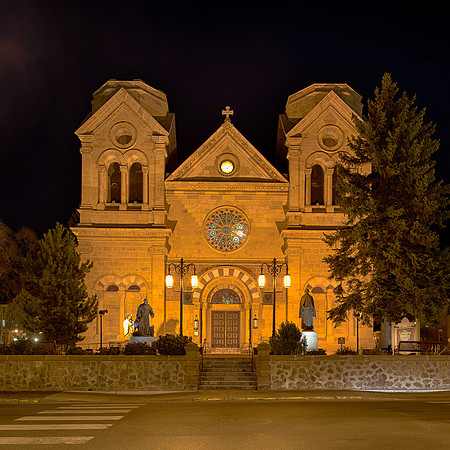
Shoot Before It's Too Late!Night photography provides an opportunity to exhibit a scene in a different way. Generally, I prefer to capture night images of buildings before it gets too dark. During twilight, the color of the sky is more appealing. And, the dynamic range within the scene is more manageable for the camera's sensor before the sky goes completely black. One night while I was walking in downtown Santa Fe, I captured the following photograph of the St. Francis Cathedral.
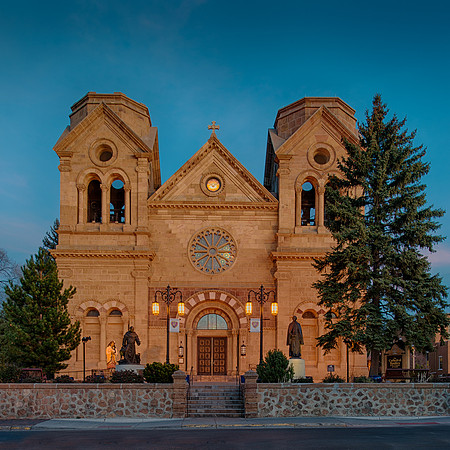
The next night, I took another photo of this church about 30 minutes earlier than my initial attempt. There was a little more light in the sky and the sensor wasn't challenged as much to retain details throughout the image:
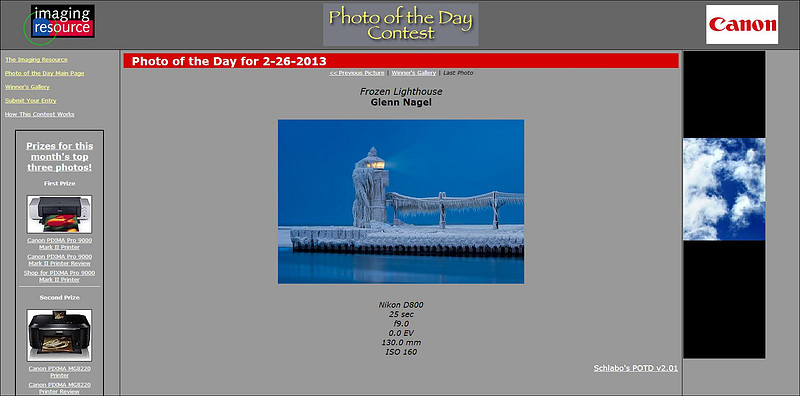
Frozen Lighthouse Wins Photo of the DayIn November, Imaging Resource selected my "Dog in Flight" picture as its Photo of the Day for 11-5-2012. Then in December, my "Orangutan Pose" photograph was the Photo of the Day for 12-3-2012. "A Helping Hand" was selected as the Photo of the Day (1-8-13). Today (2-26-13), my "Frozen Lighthouse" photograph was named as the Photo of the Day.
At the end of each month, three of the daily winners from the month will be awarded Canon photo printers. So, I have about a 10% chance of landing another brand new printer. Imaging Resources has already shipped two printers to me in the past two months! Extreme Symmetry!While shooting architectural images, I'm often amazed at how much symmetry exists in the design. I sometimes wonder if the reason we find symmetry appealing is because that is how our bodies are designed. Architects design many structures in a manner similar to the human body--with the parts on the left being duplicated and mirrored by parts on the right. While shooting pictures inside the Indiana Capitol in Indianapolis, I came across a scene which I call "Extreme Symmetry". This scene is not only symmetrical from a horizontal perspective; it is symmetrical from a vertical perspective as well. It's symmetrical looking from East to West and again from North to South. This is a rather large interior space, so the architect must have taken great pains to ensure that the design was symmetrical.
Two Printers in Two Months!On November 5, 2012, my "Dog in Flight" photograph won Imaging Resource's Photo of the Day. It then placed first for the month of November out of the 30 daily winning entries. The prize was a new professional photo printer--the Canon PIXMA Pro 9000! This afternoon, I learned that my "Orangutan Pose" photograph was Imaging Resource's Runner-Up for the month of December out of the 31 daily winning entries. This time, the prize was yet another new professional photo printer--the Canon PIXMA MG822!
Sometimes, It's Best Not to Polarize!One of my the filters I use most often while shooting outdoors is the circular polarizing filter. This filter acts very much like a putting a pair of sunglasses on your lens. It serves to cut reflections, saturate colors and add contrast to a picture. With a circular polarizing filter, you can control the degree of polarization by rotating the outer ring of the filter--and just dial in the amount of the effect that you desire. While visiting the Wisconsin Capitol building in Madison, I noticed a contemporary building with all glass walls. Out of habit, the first thing I did was to reach into my bag for my circular polarizing filter. This is the first image that I captured. Note how the filter has eliminated most of the reflections from the glass--which allows the colors to deepen:
Both images are acceptable and some viewers will prefer the first version while other viewers prefer the second version. However, I was envisioning a different shot that would not utilize the filter:
My "Annual" Month of Kelby TrainingEach year, I dedicate time during a Winter month to study some of the many helpful photography training videos offered through Kelby Training. Over the past two Winters, I've completed an average of about 25 courses a year. In my opinion, the $25 fee for unlimited training for a month is an incredible value. During this past month I worked through the following on-line classes:
Most of these courses take about an hour to complete. I find it convenient to view the classes. Not only can I watch from the large monitor of my desktop computer, but Kelby Training offers an app through iTunes that makes it easy for me to view the classes on my iPad. One way I get through so many videos is by watching while working out on the treadmill! I've been using Lightroom 4 with Photoshop CS5 for the past year, so I found the course by Matt Kloskowski to be a helpful review of all of the features included in the Develop Module of Lightroom. The courses by Ben Willmore gave me a much better understanding of how to use Curves within Photoshop. One of the main reasons I was excited to get started with my month's subscription was to view the compositing courses by Joel Grimes. Joel provided detailed instructions on how he accomplishes his gritty sports composites. I plan to try my hand at the technique this Spring when I shoot my youth sports portraits. Watching Jay Maisel is always a pleasure. Last year, I watched two other courses by Jay Maisel through Kelby Training. I find his work to be inspiring. More importantly, his perspectives on photography always challenge me to improve. I never really put much thought into light painting. Dave Black's courses on light painting has me excited about the possibilities. In the third course of the series, he demonstrated how to paint landscapes in two locations in Grand Teton National Park that I visited a few months ago. I wish that I had been familiar with this technique before I visited the park as his results are amazing. Kelby Training gives me an opportunity to practically look over the shoulder of the masters at work--all for just over $1 per class!
|