|
I'll be posting some random thoughts here about my photography: my travel plans, technical information behind some images, stories about how certain pictures were captured, etc. The timing of the postings will also be random as my priority is capturing new images rather than writing about existing ones. I hope you will feel free to comment on any of my postings and I appreciate you taking time to read my entries.

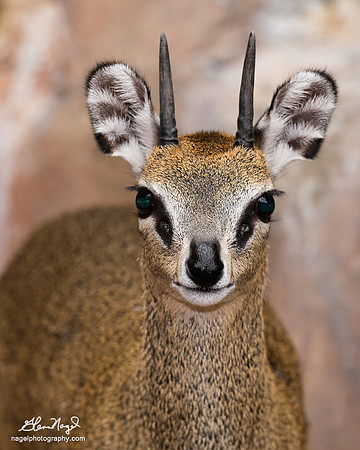
Eye ContactEarlier today, I visited the Brookfield Zoo. It was raining, so I spent all of my time in an indoor exhibit taking pictures of Golden Weavers and a Klipspringer (small African antelope). This image of the antelope is my first photograph since returning home from the Desert Southwest Road Trip in mid-August.
One of the things I find appealing about this image is the eye contact. The antelope is making a connection with the viewer. I'm often asked how I get animals to look into my lens. In some ways, it's easier than one would think. It's mostly a matter of just waiting until the animal looks in my direction! I try to attract the animal's attention by making noises, waving my arms or triggering my flash unit. In the zoo, these tactics aren't usually very effective. The animals are immune to these methods given the number of visitors, particularly kids, who walk by the exhibits all day. In the end, it just takes patience. 30 Seconds Every 30 MinutesAfter spending a few days in the desolate Chaco Canyon, the crowds at Mesa Verde National Park in Colorado came as a quite a shock. My first stop was the visitors' center. At least 30 people were standing in line to purchase tickets for the ranger-led tours to the various ruins. I envisioned a shot from the interior of the kiva at the Spruce Tree House ruin. However, the line to enter the kiva was always at least 25 people deep. At any given time, the kiva was packed with people. There was no way that I could squeeze into the kiva let alone set up a tripod to capture an image in the dark space. It was a challenge to photograph the ruins without having massive crowds of tourists throughout the frame. This image provides some perspective on the crowd as it approached the Cliff Palace ruins in front of me:
In the above photo, one tour is approaching the ruins while another is exiting from the other side. If the ranger who is leading the trailing tour waits a bit before moving into the area with the ruins, a photographer has a brief window of time to capture some photographs without tourists in the frame. Sometimes, there is no window of time because one group enters the area before the other group leaves. Other times, the photographer might get up to a minute or two. On average, the ruins might be unobstructed for 30 seconds every 30 minutes. It takes some patience, but by waiting 60-90 minutes, I was able to get several shots within about two minutes of shooting time! At times, a few stragglers would remain in the frame from the previous group, but they were easy enough to remove in Photoshop. Fortunately, the weather cooperated during those couple of minutes of shooting time.
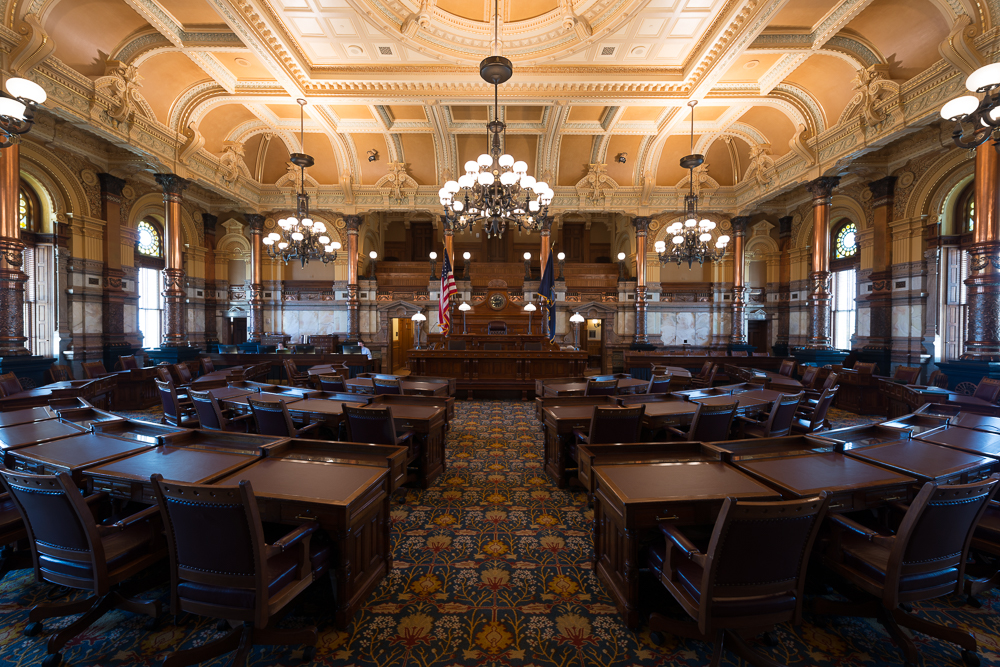
Often times, I think our world has become too crowded. There's a good possibility that overpopulation and the resulting demand on limited resources is why these dwellings were deserted--and why they look they way they do today. Take Away the BluesWhen capturing photographs of interiors, mixed lighting sources can present a challenge. Typically, the artificial indoor lighting can appear very orange. Daylight streaming in from the windows usually appears to be blue. Since there are multiple sources of light within the same frame, adjusting the white balance setting on your camera won't work. The camera will only allow you to choose one light source--so you'll be forced to pick one. Here's an example using a recent photo from the Kansas State Senate Chamber. The camera has more or less rendered an accurate color for the light from the chandeliers. But, the light streaming in from the windows is rendered as blue. Notice how blue many of the desk tops and leather chairs appear. While your eye naturally corrects for these various light sources, the camera sensor doesn't.
Correcting a photograph with multiple light sources can be challenging. Some photographers just give up and convert the picture to black & white! However, I discovered a very fast method for taking care of this common problem:
I find the final photograph more appealing for two reasons. First, the blue cast is removed. Next, I bracketed a few more exposures to bring out more details in the highlights and shadows of the frame.
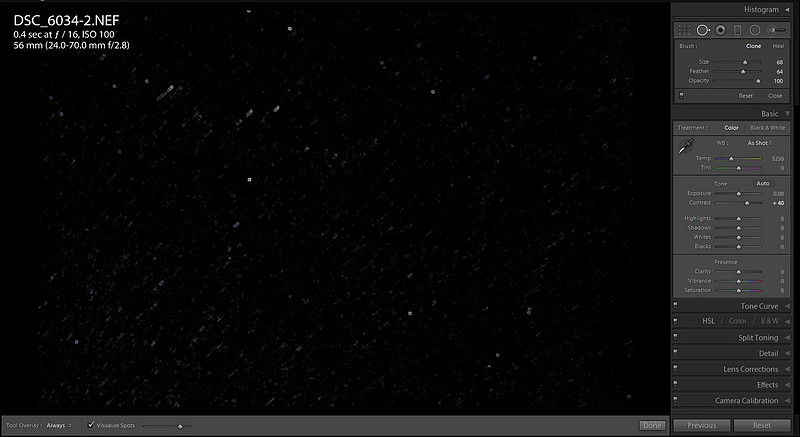
So Far, So GoodNo matter how hard I try, I just can't seem to get the hang of "wet cleaning" my sensor. After my last two attempts, I had to take my camera to APS (Authorized Photo Service) to get my sensor properly cleaned. While I highly recommend APS for any Nikon service or repair, I would rather not deal with the inconvenience of getting my camera there or pay to have my sensor cleaned if it's not absolutely necessary. My most recent 23 day road trip included two photos sessions in Antelope Canyon. As many photographers know, the slot canyons are very dusty. What makes it worse is that the Navajo guides like to throw sand and dust into the air to accentuate the light beams. Obviously, my sensor was going to require a good cleaning after this long trip--especially since I tend to change lenses frequently in the field. Here's how my sensor looked when I returned home from the trip:
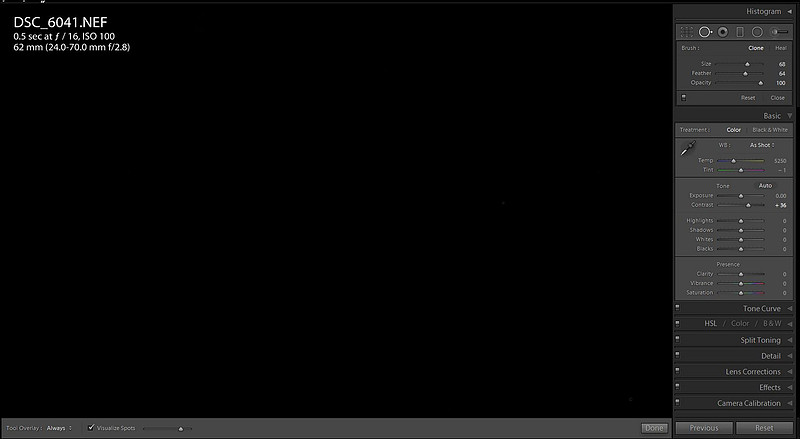
While this sensor is clearly dirty, it's not nearly as bad as I thought it would be! But, it needed cleaning. And, it required more than an air blower or sensor brush is capable of accomplishing. My days of wet cleaning the sensor are probably over. So, I decided to try a new product called the Sensor Gel Stick. Click here to view the product along with an instructional video. While it's not cheap at $50, it would be a bargain if it works! After a few minutes of cleaning my sensor with the Sensor Gel Stick, here's my sensor now at the same camera settings:
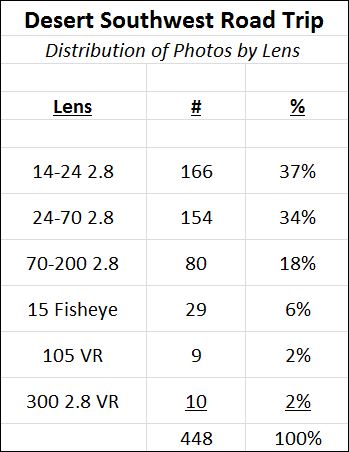
Desert SW Road Trip -- LensesI've received a few questions regarding which lenses I used the most during my recent road trip to the Desert Southwest. To view the photographs from this trip, please CLICK HERE. During the trip, I captured 448 images which I considered to be "keepers" and which I processed. Following is the distribution of the photos by the lens:
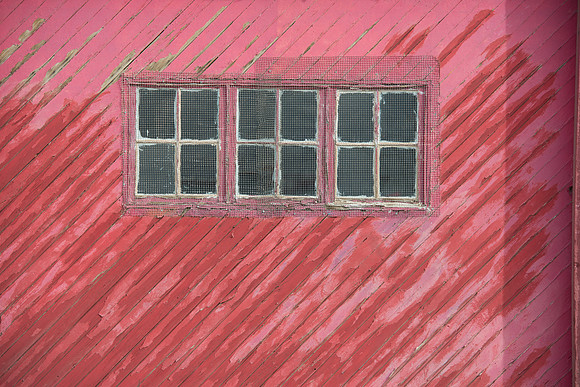
Of course, the lens selection is correlated with the subject matter. The subject matter during much of this trip was architecture. I visited five State Capitols (Missouri, Kansas, Colorado, Arizona and Illinois)--all of which called for wide lenses for the vast interiors. I also visited many Indian ruins. I chose very wide focal lengths most of the time for those locations. I did not take photos of wildlife this time. If wildlife was a subject, the distribution would have shifted towards longer focal lengths. I took only 12 pictures with an aperture wider than f/8! The majority of my pictures (303 of them to be exact) were shot at just two apertures--f/8 and f/9. This also relates closely to the subject matter that I concentrated on during this trip. In case you are wondering how I compile all of this information, Lightroom makes this very efficient. I temporarily created a Collection called "Road Trip" and included all of the photos from my trip in that collection. If a photograph consists of multiple exposures, possibly due to it being a high dynamic range (HDR) image, I only include the top image so as not to skew the totals. This is accomplished by "stacking" the images--having only the finished image on top with the others filed in the stack underneath the lead photo. Once the collection is created (which took me 30 seconds), I use the metadata filter to view the photos by various attributes: aperture, lens, focal length, shutter speed, etc. The 14-24 was a workhorse during this trip. When I first purchased the lens, I wasn't comfortable shooting at such wide focal lengths. I hardly used the lens for about six months and contemplated selling it. Finally, I forced myself to start using it...and in time I started seeing things from a wide angle perspective. As more time progressed, I found that I really enjoy how the lens allows me to create photographs that are more out of the ordinary than a "normal" focal length might offer. I purchased the Sigma 15mm fisheye lens last year. It's a specialty lens and suitable for a very limited number of subjects. However, I am very pleased with the lens. When the right situation presents itself, there's nothing quite like the fisheye lens. I think the 29 fisheye images that I created is a good number. Some of those pictures would not have been possible if I wasn't carrying that lens. To view more photographs that I've made with the Sigma fisheye, please CLICK HERE. Behind the ScenesIt was drizzling and overcast during one of my days at White Sands National Monument in New Mexico. So, I searched for suitable subjects in the nearby town of Alamogordo. The color and texture of this garage door caught my eye.
While considering the scene, I envisioned a couple of things that I thought would improve the final photograph. The first thing needed to be done before I pressed the shutter. This garage door faced the main road that runs through Alamogordo. This section of the main road was under construction. There were some road signs that need to be moved so that I could capture a clear view of the garage! Next, the image straight out of the camera (SOOC) appeared dull--lacking in color and contrast:
Using Lightroom to increase the Vibrance and applying Nik Color Efex Pro 4's Tonal Contrast filter helped give this image some much needed pop. A 500mm LandscapeOften times, I like using long lenses when capturing landscape images. I find something appealing about the compression of the scene that the longer focal lengths provide. Sometimes I wonder if I'm not drawn to using the longer lenses simply due to their cost. The long prime lenses cost a fortune, so I try to use them whenever I possible can! Last summer, I visited Hayden Valley in Yellowstone National Park. I spent far more time in the valley than I wanted to, mostly because of the "bison jams" on the road that connects the Lake Area to the Canyon Area inside the park. Bison herds tend to gather in Hayden Valley. The herds constantly work their way onto the road. These massive animals tend to just stand on the road. There's no way to drive around them, so at times it would take up to 90 minutes to travel just 20 miles in this section of the park. One night, I decided to stop at a pullout to kill time while waiting for the bison to move. I captured the following image with my 500mm lens attached to the Nikon D800:
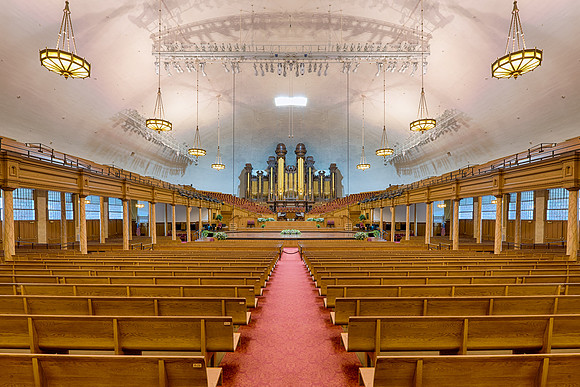
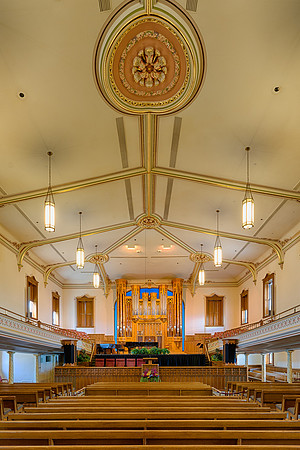
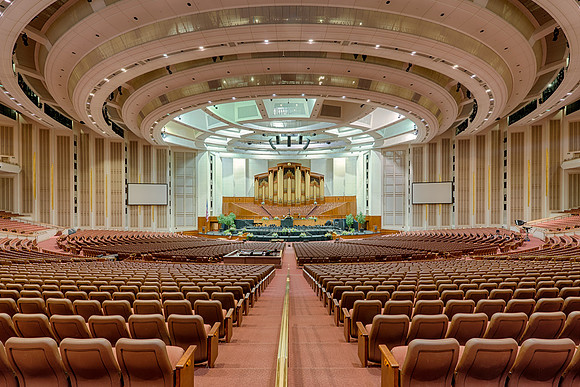
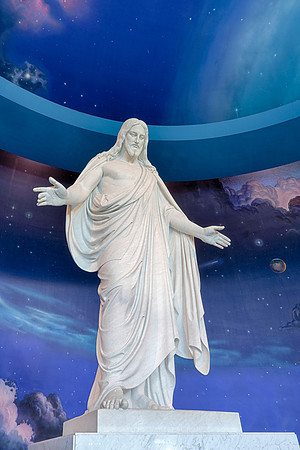
My Day with the Latter-Day SaintsDuring my last visit to Salt Lake City, I spent a day at Temple Square. The Square is located in the heart of Salt Lake City and includes a number of interesting buildings such as the Salt Lake Temple, the Tabernacle, the Assembly Hall, the Visitor Centers and the nearby LDS Conference Center. With the exception of the Temple itself, photography is welcome in all of these facilities. The inside of the Temple is off limits as the church considers it to be sacred and requires a "temple recommend"--which I didn't have. At first, I captured images of the Salt Lake Temple from the outside. There are two reflecting pools nearby.
I wasn't sure what to expect as I entered the Tabernacle. But, I was told that I was free to take as many photographs of whatever I wanted--a message that was repeated in every building that I entered! Unlike so many other venues, my tripod wasn't a problem either. Later, I would return to the Tabernacle on a free guided tour. The building has a fascinating history and amazing acoustics. While all of us sat in the back pews, the guide stood at the podium. She slowly tore a single piece paper. Then, she dropped a pin on the floor. We could hear both of those things very clearly!
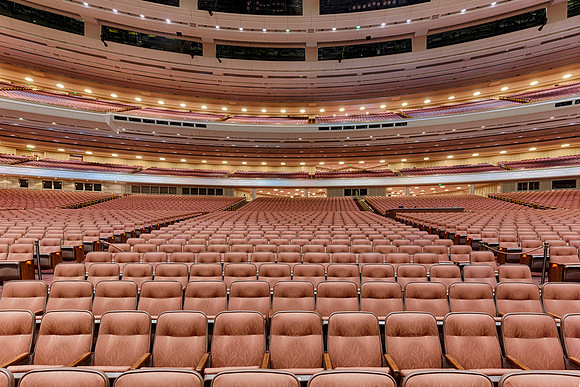
I entered the building and asked if I could view the auditorium. Before long, a guide was assigned to me and two other visitors. The guide brought the three of us to the viewing area. The auditorium is certainly impressive, but the perspective from the viewing area isn't the best for photography. I asked if it would be possible for me to move down to the floor.
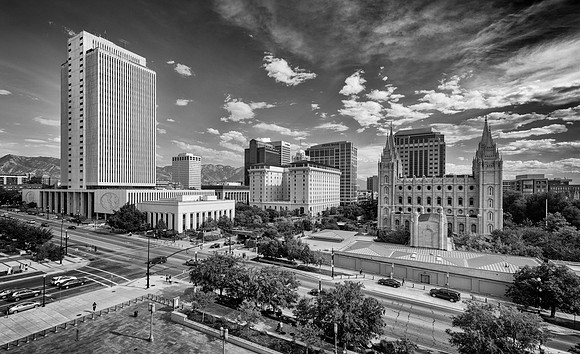
Next, he asked me if I would like to go up on the roof of the building. The roof houses a beautiful park--including trees and grasses and lots of water. While up there, I captured a photograph of downtown Salt Lake City:
During my nearly 3 hour visit, I asked several questions about the Mormon religion. Or, as I learned during my visit, the religion is better referred to as the Latter Day Saints. I'm always interested in different religions and was (probably still am) ignorant of the Latter Day Saints. As I asked these questions, my guide (a prior bishop of the Church) always started his reply by telling me that the only reason he was talking about the religion is because I was asking. He said it wasn't the purpose of the tour to "push" his religion--but that he would be happy to discuss it if that was my preference. I enjoyed my visit with the guide very much. He respects my religious views and I respect his--and we had a great time that afternoon in Salt Lake City. After my visit to the LDS Conference Center, I returned to Temple Square and went to the Visitor Center to learn some more about the religion. Like all of the other buildings I visited, the Visitor Centers (there are two on the Square) are immaculate. It requires a great deal of attention to keep everything so clean. For example, I noticed that people came by to clean the outside water fountains on a regular basis.
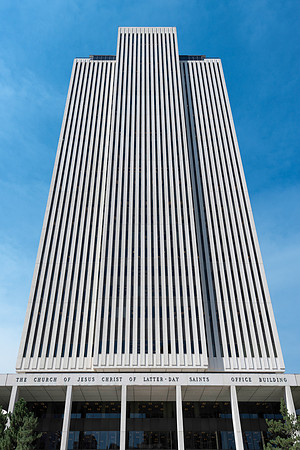
As my visit to Salt Lake City was coming to a close, I was disappointed that I didn't have time to capture photographs of the city from the top of the Church of Jesus Christ of Latter Day Saints Office building. I was told that a guide would take me anywhere in the office building that I wished--and that once again I was free to take photographs of whatever I wished.
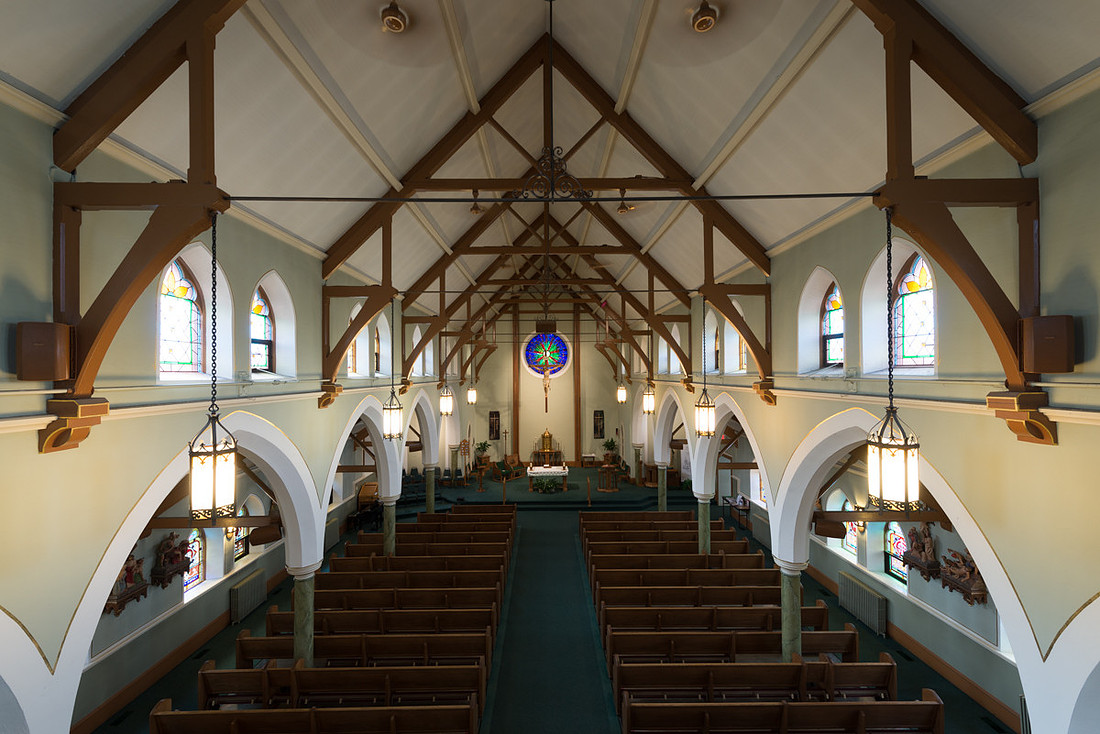
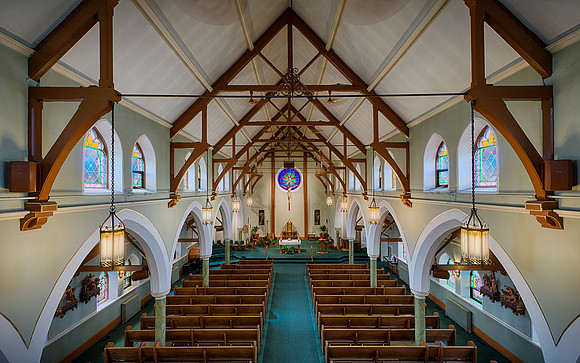
Window TreatmentsI enjoy taking photographs of interiors. One of the challenges with many interiors is the large dynamic range of light that's present in the frame. Many times, bright sunlight is shining through the windows while other areas of the scene are dark. In situations like this, my first approach is to create a high dynamic range (HDR) photograph by blending a number of bracketed exposures. When the range of light varies more, I bracket more exposures. Sometimes I end up with as many as 9 exposures bracketed one stop apart when producing a HDR photograph. Yesterday, I photographed the interior of the historic St. Patrick Church in Lemont, Illinois. The range of light in the frame was significant. The following image is the best single exposure that I could achieve. It's not terrible, but note how the highlights in the chandeliers and windows are partially blown out:
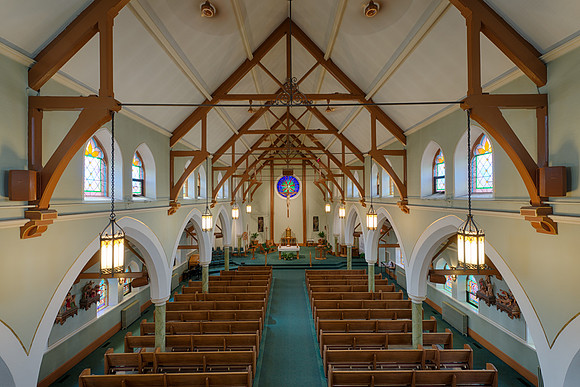
Next, I bracketed 7 exposures and then blended the exposures together to create a high dynamic range (HDR) photograph. The result is better, but I was hoping to retain more color and detail in the stained glass windows:
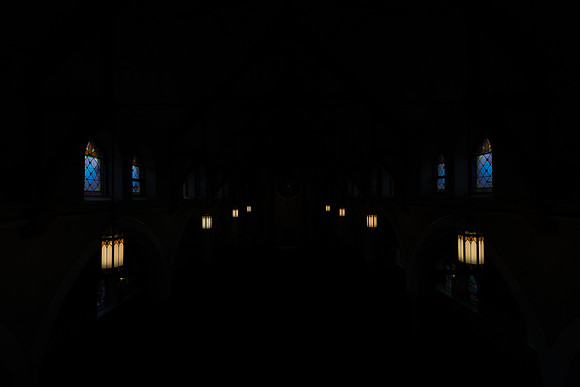
Finally, I tried a new approach that I recently learned by viewing Jimmy McIntyre's tutorial on blending exposures with luminosity masks in Photoshop. Click here to view that tutorial. As the tutorial instructed, I made an additional exposure of the scene that was significantly underexposed. Yet, this highly underexposed frame represents a reasonable exposure for the very bright highlights:
West of the MississippiThis morning I visited the Arizona State Capitol in Phoenix. I now reached a milestone of photographing every state capitol building west of the Mississippi River--with the exception of Alaska and Hawaii. I plan to visit Honolulu this winter. Following is a map of the capitols that I've visited so far:
Click here to view my favorite capitol pictures. Click here to view the images categorized by state. Please note that I am still on the road and won't have my most recent four Capitols available for viewing for several weeks--Arizona, Colorado, Kansas and Missouri. I also plan to revisit some of the capitol buildings that I first visited as part of this project. I have very few images from my home state capitol of Illinois! And, I have just one exterior photograph of the Minnesota Capitol. Over time, my understanding of how to approach a capitol photo shoot has changed--and hopefully improved! |