|
I'll be posting some random thoughts here about my photography: my travel plans, technical information behind some images, stories about how certain pictures were captured, etc. The timing of the postings will also be random as my priority is capturing new images rather than writing about existing ones. I hope you will feel free to comment on any of my postings and I appreciate you taking time to read my entries.

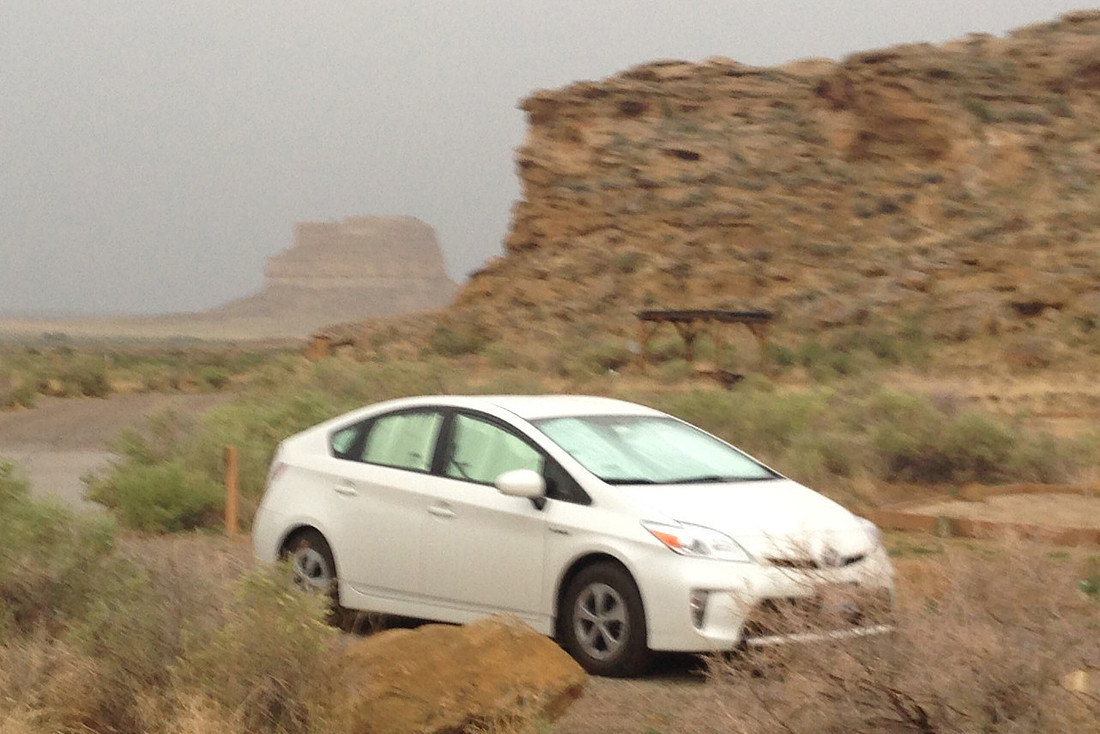
The Road Less TraveledDuring my recent Desert Southwest Road Trip, I visited Chaco Culture Historical Park in New Mexico. This was one of my favorite locations of the trip, in part because the crowds were so sparse. One of the reasons for the few visitors is that the park isn't always easy to access. Since I was driving a Prius, which is a very low clearance vehicle, I drove into Chaco from the north. I was told that the road from the south required a high clearance vehicle, but that the northern route was usually suitable for a passenger car. From the north, I exited highway US 550 about three miles south of Nageezi onto CR 7900. From there, the first 8 miles of the road is paved. The next 13 miles is a dirt and gravel road, and the final 4 miles are not maintained and very rough. The conditions were dry, so driving into the park didn't present much of a problem. For the last four miles, the road is so rough that I had to drive slowly--usually about 5 miles per hour and never exceeding 10 miles per hour. But, with a little patience, I arrived at Chaco with a dusty Prius. Because the park isn't nearly as accessible as most others (i.e., Mesa Verde), the location was free of crowds. The Chaco Canyon is filled with amazing ruins. Most times, I had the ruins to myself. I also participated in numerous ranger-led tours during my three days in the park. Most times, there were just a few of us on a tour. Another factor that keeps the crowds down is that there are no services available at Chaco--no food, no gas, no ice, no cell service, no internet and no lodging other than the campground. I brought enough food for a few days. My Prius rarely needs gas. And, I had a cooler of ice which melted after the first day. Here's my brand new Prius at the Chaco campground. Please forgive the poor image quality--I still haven't figured out how to work the camera on my iPhone!
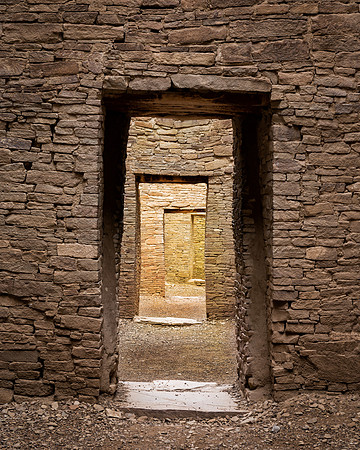
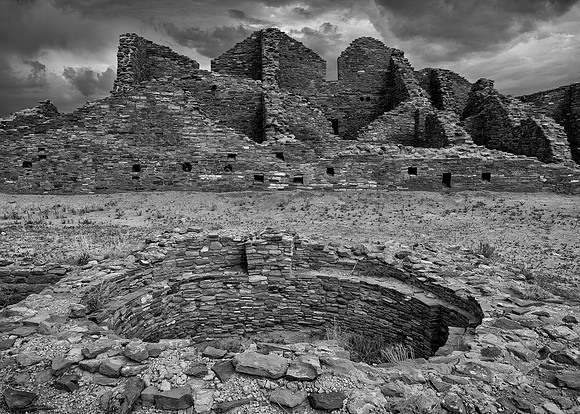
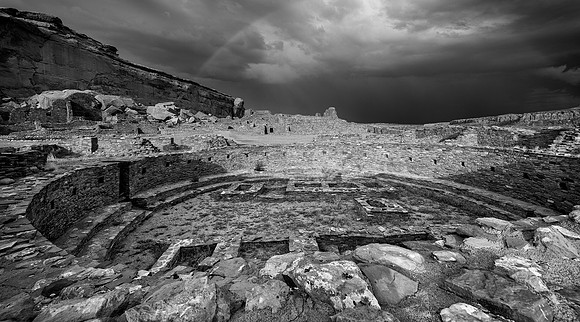
I spent the better part of my first two days in the park scouting for good photography subjects. When the light finally broke through the clouds, I was able to get in the right spots quickly and capture enough pictures to salvage the visit from a photography perspective. Here are a few of my favorites:
The mud at Chaco isn't like anything I've experienced before. It's like a thick glue. I was told that if I had kept driving, the mud would pack the tire wells to the point where the tires could no longer rotate. It's also very slippery. It's easy to slide off the road. Without cell or internet service, I was looking at a long walk in that muddy mess. I went into the visitor center to try to plan my next move. The ranger told me that the road can be impassable after rain and that I would just have to wait it out. He said that I should probably try again in the afternoon once the mud had a chance to "bake" for a while. He also said that there was more rain in the forecast! It was looking like I might be at Chaco for a lot longer than I had planned. The ranger told me that maybe I would be like him. He stayed for 28 years! Actually, I was impressed with the enthusiasm of all of the rangers at Chaco. They all love the place and wouldn't want to be anywhere else. A few hours later, I once again tried to leave the park. This time, the mud had dried just enough for my car to power through it. Although I certainly had my challenges at Chaco, it will always be a special place to me. The canyon is beautiful, the ruins are fascinating, the rangers are enthusiastic--and I felt like I had the place all to myself. But, next time my Prius is going to sit this one out.
One Less Photo LocationAfter a round of golf at the Manteno Golf Club yesterday, I stopped by the Manteno State Hospital to photograph an abandoned building. On what was once a very large campus which housed more than 8,000 patients, just one empty building remained since the mental hospital closed more than 30 years ago. To view photographs from my past visits, please CLICK HERE. It had been just a few months since my last visit, so I was surprised to see that this old structure is now fully renovated--new roof, modern windows, etc. A new business has moved into this large facility. Of course, it must be considered to be progress to transition an old, empty, rundown building into a fully functioning building. Yet, in some ways it's sad to lose the last remnants of this large campus and one of my favorite photography locations in the area.
"Blue Swallow Motel" Wins Photo of the Day!This morning, my "Blue Swallow Motel" picture won Imaging Resource's "Photo of the Day". CLICK HERE to view Imaging Resource's Photo of the Day page. This photograph was taken in Tucumcari, New Mexico during my recent Desert Southwest Road Trip. CLICK HERE to read more about the logistics behind this image.
This marks the 22nd time in the last 23 months that one of my photographs was recognized by Imaging Resource as its "Photo of the Day". Blue Swallow MotelWhile driving sections of Route 66 through New Mexico, I remembered that Rick Sammon had once posted a photo of the historic Blue Swallow Motel on his photography blog. So, I made plans to spend a night at the motel in Tucumcari, New Mexico. That way, it would be convenient to capture a picture of the motel and vintage sign when the light was best.
The reviews were very positive regarding this motel. And, in my judgment those reviews are accurate. The motel is very clean and reasonably priced. I arrived in the middle of the afternoon. While checking in, I had two questions for the owner. Was he going to turn on the sign? Would he leave the vintage automobile parked under the sign? He replied that he turns on the sign every night. Also, he always parks a car in front of the office so that higher vehicles won't pull under and potentially damage the sign. After shooting for a while in downtown Tucumcari, I made sure to get situated in time to capture a twilight image of the motel. If I were to wait much longer, the sky would go completely black and the scene would lose a significant amount of color and detail. So, I began shooting just after sunset. Getting into position to shoot this motel at twilight in the small town of Tucumcari took a lot of planning, so I was disappointed by what happened next. Just as I was about to start shooting, a vehicle (SUV) pulled up behind the vintage car. For the longest time, he left his headlights on and they were positioned to shine directly into my lens. Then, he left the car parked there and entered the lobby--where he stayed talking to the owner for at least 45 minutes (until well after I packed up and left). I also had to deal with another challenge. A white car pulled up next to the blue motel door just behind the vintage car. It was a modern white vehicle and ruined the scene in my opinion. What made it worse is that the motel guest kept walking up behind the vintage car and looking into my camera. He seemed curious as to what I was doing and it took for what seemed forever for him to leave the frame. Now, I had very little flexibility with my composition. I kept moving the tripod up and down, left and right, to minimize the distraction of these two vehicles that didn't really belong in the scene. Notice how I've mostly blocked the SUV by positioning it behind the vintage car. At the same time, I kept moving left to use the sign to block the white car parked just left of the motel. My positioning was within an inch or two of where it needed to be to take care of both vehicles at the same time. A final challenge was dealing with a blinking neon sign. I made sure to open the shutter while the sign was fully lit. For this five frame HDR photograph, the sign was fully lit for each of the five exposures. Fortunately, I was aware of this issue during the photo shoot. I shouldn't complain too much. I was fortunate to get some nice weather and lighting in Tucumcari for this photograph. And, I was very pleased with how the picture turned out as well as with my stay at the historic Blue Swallow Motel. "Enchanted Forest" Takes 3rd PlaceMy "Enchanted Forest" photograph was awarded Third Place in Imaging Resource's monthly photo contest for August. Click here to view the news release.
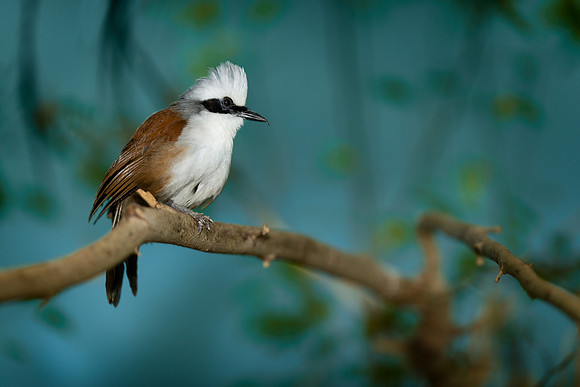
Trip StatisticsMany people think that travel must be a costly endeavor. It doesn't have to be. A couple of years ago, I completed a 22 day road trip to many amazing national parks for just over $600! The cost for last year's 27 night journey from Chicago to the Pacific Coast amounted to just under $1,000. If I factor the revenues from the sales of my photos from these trips into the equation, these trips were free of cost. The cost of my last 23 day Desert Southwest Road Trip was a bit higher. Rather than camping every night, I stayed in hotels for four of the nights. I also incurred higher entertainment costs than in previous trips. The cost of the trip was just under $1,200, excluding food. With food, it came to just under $1,500. Here is a breakdown of the costs by category: Lodging ($561) Most of the time, I camped (Prius camping) in private or national park campgrounds. I stayed at a Hampton Inn in Denver for a night and another Hampton Inn for two nights in Phoenix. I also stayed at the Blue Swallow Motel on Route 66 in Tucumcari, New Mexico. Gas and Tolls ($378) My new Prius achieves great gas mileage. This trip covered 5,155 miles. The Prius averaged 56.0 mpg over the entire trip. Entertainment ($199) Entertainment consists mostly of park and tour fees. Nearly $140 was allocated to tours of the Upper and Lower Antelope Canyons. I toured the Missouri State Penitentiary with a former warden of the facility. Entrance fees to several parks are included in this total: Natural Bridges National Monument, Chaco Canyon Historical Park, Petrified Forest National Park, Great Sand Dunes National Park, and Mesa Verde National Park along with the related tours of the ruins. I also visited the National Churchill Museum in Fulton, Missouri. Ice ($22) Most mornings, I purchased a bag of ice for the cooler in my car. TOTAL ($1,160) In addition, the cost of food throughout the trip was $327. How do I know these costs so precisely? I simply enter each expense on my phone as it is incurred using an application called "Travel Budget". I do it more out or curiosity than anything else. While many people think it costs thousands of dollars to take a 23 day trip to so many amazing locations, the fact is that it can be done for a very low cost. Keep in mind that there would have been a cost to stay home as well (gas, entertainment, utilities, etc.)! If past history is any indication, it won't be long before sales of the photographs from this Desert Southwest Road Trip eliminate the cost of the trip entirely. Laughing Thrush at f/2It's a pleasure to shoot with my Nikon 200 f/2 lens. Most times, I shoot with the aperture wide open (at f/2) when using this lens. Yesterday, I captured a variety of images using the Nikon D800 and the 200 f/2 while visiting the Brookfield Zoo. The subject of this image is a White-crested Laughing Thrush. This bird was photographed in the free fly area of the Perching Bird House.
1/50th, f/2, ISO 125 I think the very narrow depth of field directs the viewer's attention to my subject by making the bird the only sharply focused area within the frame. The shallow focus zone also helps blur out what otherwise would be a very distracting background of branches and leaves. The wide open aperture also allows me to select a lower ISO setting--which in turn maximizes image quality. By comparison, if I had selected an aperture of f/8, the ISO setting would have increased to 2000 to maintain the same exposure. While ISO 2000 might still generate a salvageable picture with today's digital sensors, the image quality is not nearly as high as with ISO 125. The use of my Nikon SB-900 flash unit also helped this image. The viewer's attention is once again directed to the bird due to the added illumination from the strobe. And, the short duration of the flash burst helps freeze any motion (from the bird or from camera shake) to provide a sharper image. Finally, the added light helps in that I can select a lower ISO setting. The bird's position in the frame provides for a strong composition. The branch provides a leading line to direct the eye to the bird. And, the bird has plenty of space in the direction that it is looking within the frame. I'm glad that I live so close to the Brookfield Zoo. It makes it easy to go out and practice shooting--rain or shine. There are interesting subjects to photograph in both the indoor and outdoor exhibits. Here's another entirely different image from yesterday that I captured with the Nikon 200 f/2:
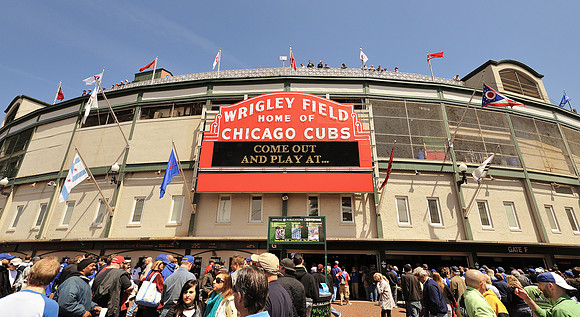
Fisheye PerspectiveLast year, I purchased a fisheye (Sigma 15mm) lens. This is a specialized lens with limited application. I probably only use the fisheye for 1 or 2 shots out of 100 frames. However, certain scenes just call for a fisheye. So, I'm glad that I have one in my bag when I need it. Click here to view samples of images that I've captured using a fisheye lens over the past several months. Earlier this week, the fisheye came in handy. I took a tour of Wrigley Field. While waiting for the tour to start, I captured an image of the outside of the ballpark. The entrance is decorated to celebrate the 100th anniversary of baseball at Wrigley Field. Here's the photograph using the Sigma 15mm fisheye lens with my Nikon D800:
As a perspective, I captured a similar photo from the same vantage point four years ago. This next photo was taken at an ultra-wide 14mm focal length:
I've found the fisheye to be particularly effective when shooting circular subjects such as the inner dome of a State Capitol. With circular subjects, it's nearly impossible to detect any fisheye distortion, yet the fisheye is often the only way to include the entire dome in the frame.
The distortion of the fisheye can also make certain scenes look strange or quirky. I used this feature to help make my neighbor's Christmas decorations look a little more whacky. Note that the curvature of the sidewalk is entirely the product of fisheye distortion.
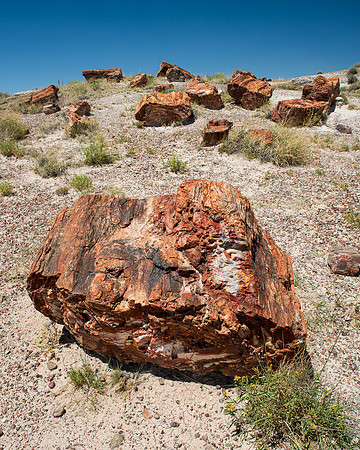
The more I use the lens, the more I learn how to see things from a fisheye's perspective. Focus Stacking & MoreDuring my last road trip, I used focus stacking for several images. Focus stacking involves taking multiple exposures to achieve a greater depth of field for tack sharp focus throughout the image. The following image was captured at the Petrified Forest National Park in Arizona. The large petrified log is located very close to my lens. The logs in the background are quite distant. One approach to dealing with a situation like this is to select a very narrow aperture such a f/22. The downside of the narrow aperture is that images are typically not rendered as sharp at such an extreme f/stop. Also, the depth of field isn't great enough at f/22 to render the entire frame sharp in this case. The other approach, which I used here, is to take one photo with the focus on the log in the front of the frame and another photo with the focus on the logs in the back of the frame. Then, the two (or more) exposures can be blended together in Photoshop to render the entire frame as tack sharp.
I use the following method to accomplish this:
I used this approach many times to extend the area of focus while using an optimal aperture (f/8) for overall image quality. Here's another example of a focus stacked image with the rocks in the foreground situated just inches from my lens:
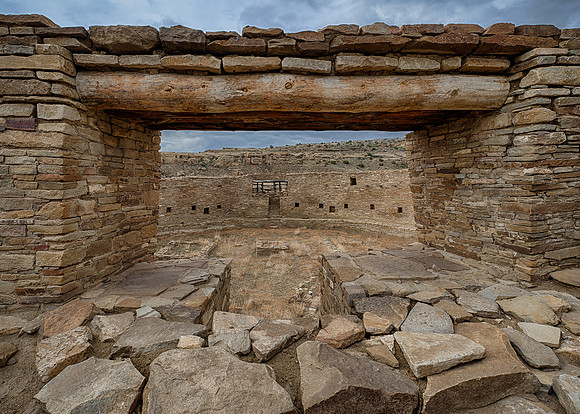
The above image of the Great Kiva at Casa Rinconada consisted of ten images. First, the focus was set on the rocks in the foreground and five exposures were captured to create a high dynamic range (HDR) picture. Then, the focus was set on the back wall of the kiva with another five exposures for a second HDR image. The two HDR images were then focus stacked. In the end, it took ten frames to render the entire image sharp as well as to extend the dynamic range to provide details in the shadows and highlights of the photograph!
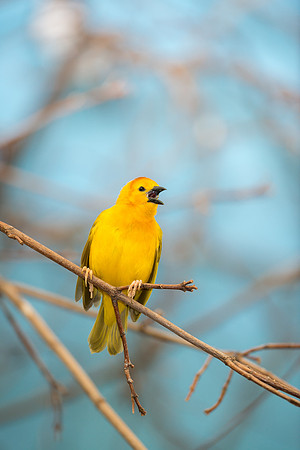
CroppabilityI doubt if "croppability" is a word--but for photography it should be! One of the things I like most about my Nikon D800 is its croppability. This advantage comes into play most often when taking photographs of wildlife. I think this image of a Golden Weaver helps illustrate this advantage. Here's the out of camera (OOC) image from the D800. It's not cropped at all, so the dimension of this file is 4,912 pixels wide by 7,360 pixels high (or 36 megapixels):
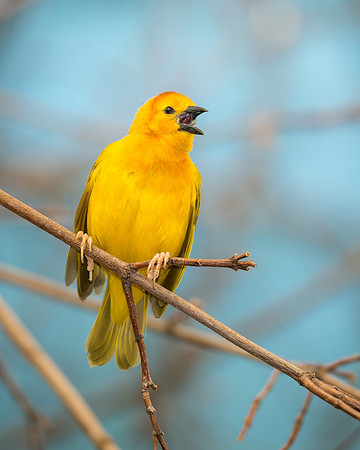
In my opinion, this image is much stronger when cropped. The cropped version guides the viewer's eye to the subject of my photograph in the most basic way possible--by making the subject larger within the frame.
This is a significant crop, yet the remaining file is still quite large. The cropped version measures 3,772 pixels wide by 4,715 high (or 18 megapixels). As a perspective, if I had captured this same picture with my Nikon D700 the original file before cropping would have been only 12 megapixels! This photograph was captured with a 500mm f/4 lens. I left the aperture wide open at f/4 and selected a very slow shutter speed of 1/40th of a second. The ISO was 800. As a perspective, if I had stopped down to f/5.6 and gone with a reasonable shutter speed of 1/320th of a second, the ISO would have increased to an astronomical 12,800 to achieve the same exposure. At that ISO level, my post processing treatment would have been to just delete the image from the card! Croppability helps to keep the ISO down. If I had instead elected to use my Nikon 1.4x teleconverter to achieve more reach, my ISO would have been 1,600 to achieve the same exposure (due to the narrower aperture required). Not only does the higher ISO setting negatively impact image quality, but so does the addition of another piece of glass (the teleconverter). Also, my depth of field becomes wider with a narrower aperture--which diminishes my creative intention of blurring the very distracting branches behind the bird. While many people tend to mention how the larger files make it possible to create bigger prints, I think the advantages of "croppability" extend far beyond that. |