|
I'll be posting some random thoughts here about my photography: my travel plans, technical information behind some images, stories about how certain pictures were captured, etc. The timing of the postings will also be random as my priority is capturing new images rather than writing about existing ones. I hope you will feel free to comment on any of my postings and I appreciate you taking time to read my entries.

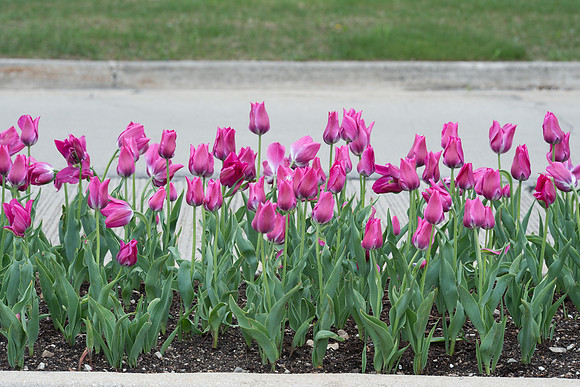
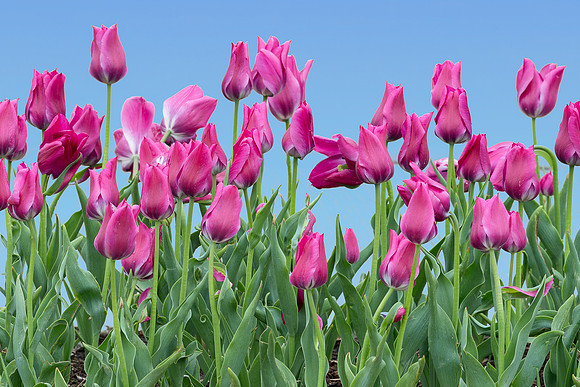
The Evolution of a PhotographLast week, I visited the Oakbrook Shopping Center to capture some photographs of the tulips. While taking the pictures, I envisioned what the finished photograph would look like after processing. Here's how one of the images progressed from the camera's sensor to the final photograph: I noticed this row of pink tulips planted on the center island of the road that enters the mall. I saw that the street would provide a clean backdrop for the tulips. I moved the camera into a higher position and then closer to the tulips to ensure that the pavement would cover the background. I didn't want the grass in the background to intersect with the line of tulips. One of the challenges was getting into position quickly enough to take a picture during a rare lull in the traffic! Here's the image straight out of the camera:
Then, I sent the image to Photoshop to make some additional edits:
After applying all of the above adjustments, here's how the image looks:
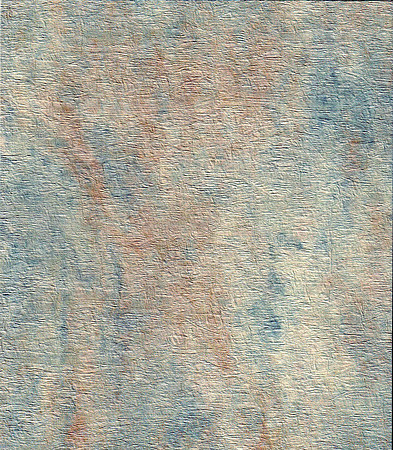
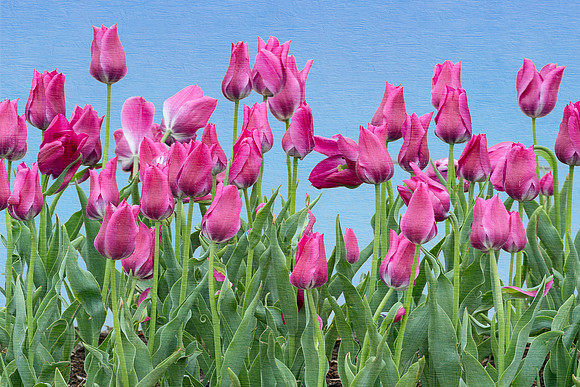
CLICK HERE for higher resolution image Then, I created a second version (which I prefer) with some texture applied to the picture. Here are the steps that I used to create the final photograph:
CLICK HERE for higher resolution image Tilt for a More Dynamic CompositionIn my last blog entry, I wrote about my experience shooting high school tennis. After the shoot, I also posted a few of my favorite pictures on a photography forum (the Nikon Cafe) for critique. One of the members was kind enough to offer some suggestions for improving my set of photographs. When viewing all of these photos, you'll note that I took great pains to ensure that each frame is perfectly straight with a level horizon. The forum member suggested that I play with and add some tilt to some of the crops. Sometimes, shooting a subject on an angle makes the image more dynamic--which is particularly helpful with action shots. I revisited some of the images and adjusted the crops. I like the affect. I also like how the treatment adds diversity to the collection of photos from the session. And, I suspect that the players will like some of the tilted shots more than my original crops! Here's an example of two images--one with a straight horizon and the other with an intentional tilt:
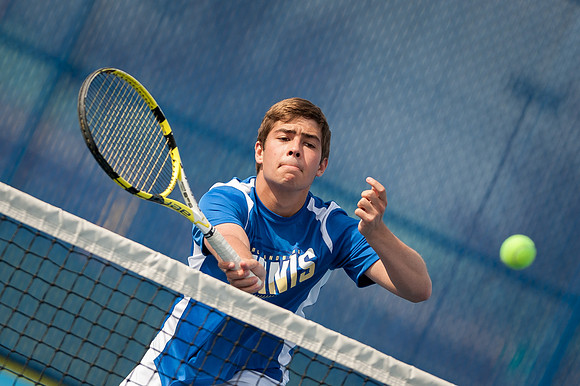
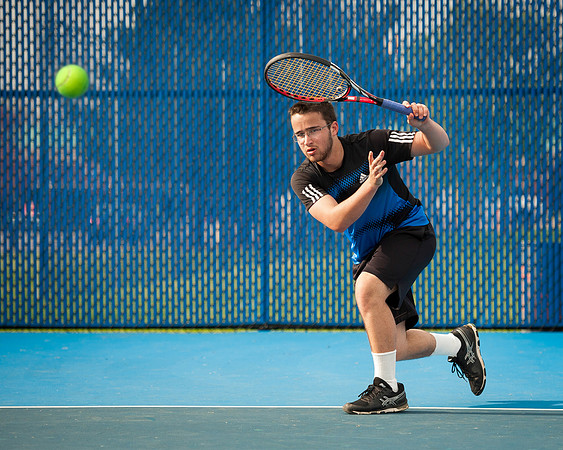
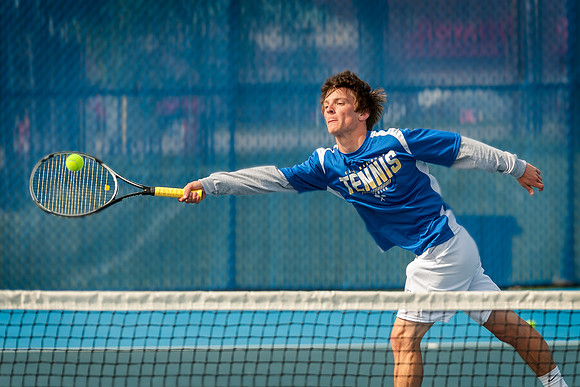
Tennis Anyone?A few days ago, I visited Carl Sandburg High School in Orland Park to photograph some of the tennis players during the team's practice. This was my first try at capturing pictures of this sport. The photo shoot was scheduled for 3:30 PM on a Friday. I hoped for clouds as I don't like the high contrast images that result from harsh sunlight. The practice started out with a clear sky and some difficult lighting, but eventually some clouds diffused the light and led to more appealing pictures. My goal was to create "sportraits". To me, a "sportrait" is a portrait of an athlete captured while they are playing a sport. My goal is to produce a tack sharp image in which the player's face is clearly visible, the expression is appropriate, and the ball is in the frame. The keeper rate for this kind of session is quite low. I set the camera for a very wide aperture in order to blur the background as much as possible. The downside of this is that the field of acceptable focus is very narrow which leads to more out of focus frames. Also, the ball isn't in the frame for very long. Finally, the poses and expressions are very awkward in a high percentage of the frames. In the end, I shot 2,000 frames. 250 were keepers. I thought about 130 were worth editing. To maximize the success rate, I used a few approaches. First, I looked for the court with the cleanest background. A few of the courts had blue windscreens along the fence--so I shot in that direction. Without the windscreen, the backgrounds would have been cluttered and the pictures would have been a mess. Next, I set the camera for a high shutter speed to stop the action (usually about 1/5000th of a second). I used the rapid burst feature of my Nikon D700 to achieve a high frame rate of approximately 8 frames per second. This can be achieved by inserting eight AA batteries into the battery grip. Since this was a practice, I positioned myself on the court. Sometimes, I was just behind the net with tennis balls flying a few feet over my head (and my lens). In part because I was in the middle of the action, the players didn't always hitting the ball as hard as they otherwise might--which didn't result in realistic images. It's challenging getting players to move as if they are playing in a real match. Fortunately, all the players were cooperative and polite--and a pleasure to work with. Occasionally, the action resembled that of a real match. After the images are captured, it's time to process them. I found that the highlight and shadow recovery sliders within Lightroom 6 were very helpful when processing many of the images from this photo shoot. Many times, I cloned out extra tennis balls that were laying in the background. Sometimes, I added some blur to the background. A few times I moved the tennis ball to a more appealing position within the frame. I almost always added a vignette to direct the viewer's eye to the subject of the picture--the player. CLICK HERE to view 25 images from the photo shoot. Here are a few of my favorites:
Putting Perfume on a PigThe other day, I walked around downtown Tinley Park (a suburb of Chicago) and was taking pictures. I liked some of the compositions, but the lighting was flat. It was mid-afternoon and the sky was overcast. But, it wasn't a dramatic sky. It was the kind of sky that produces dull photographs. Initially, I hoped to capture a baseball team photo during this time. The overcast lighting would have been perfect for that subject. This kind of lighting produces low contrast--which makes it ideal for being able to see a face under the bill of a baseball cap. Unfortunately, the team was missing a player so the team photo will need to be taken at a later date. Hopefully, I won't be dealing with harsh sunlight during the replacement date! Since Tinley Park is just a few miles from where I live, it would have been best to just pack up the gear and return in better lighting conditions. But, I got caught up in the compositions and didn't place enough consideration on the light. As a result, I spent an hour or so taking a variety of pictures that are mediocre at best. As my post processing skills improve over the years, my chances of saving some of these mediocre files improve. But, regardless of editing skills, I've learned that nothing replaces a quality file that's captured at the time of the exposure. Trying to save photographs in Photoshop is kind of like "putting perfume on a pig." When I was younger, I played the trumpet. During one of my music lessons, I added some "vibrato"--a bending of the pitch up and down while holding a note. My instructor stopped me immediately. He said that adding a vibrato isn't necessarily a bad thing. But, it's not a good thing at all to use the vibrato to try to cover up the inability to create a pure tone. You need to start out with a quality tone before playing around with special effects. I think this applies to photography. I must strive to create a quality file straight out of the camera in order to consistently produce better photographs. Here's one of my images (straight out of the camera except for the crop) from my Tinley Park session:
For comparison purposes, here's an image from my previous photo shoot of the Orland Park Train Depot with very few edits in post processing:
"The Thinker" Wins Photo of the Day!Yesterday, my "The Thinker" picture won Imaging Resource's "Photo of the Day". CLICK HERE to view Imaging Resource's Photo of the Day page. This photo of the infant gorilla, Nora, was captured recently in the Tropic World exhibit of the Brookfield Zoo.
This marks the 25th time that one of my photographs was recognized by Imaging Resource as its "Photo of the Day". Click here to view the other 24 winning entries over the past three years.
Focus Stacking to the RescueFocus stacking can be a valuable tool to expand the area within a photograph that is rendered in sharp focus. Earlier this week, focus stacking came in handy while I was taking pictures of the historic Park School in Orland Park, Illinois. My goal was to create an image with both the foreground (the sign) and the background (the school) in focus. My first approach was to use a very narrow aperture setting (f/22). However, the sign in the foreground was so close to the lens (about 2 feet away) that it wasn't possible to get both the sign and the school in focus even with a small aperture setting. This became apparent while checking the display on the back of the camera. Focus stacking provides a couple of benefits. First, it makes it possible to create an image with both a sharp foreground and background. Next, it allows for a wider aperture setting (such as f/8 in this picture). Most lenses perform best at the middle aperture settings. As a result, not only is the image sharp from front to back, but the overall image quality is higher than it would be if I had settled for the f/22 setting.
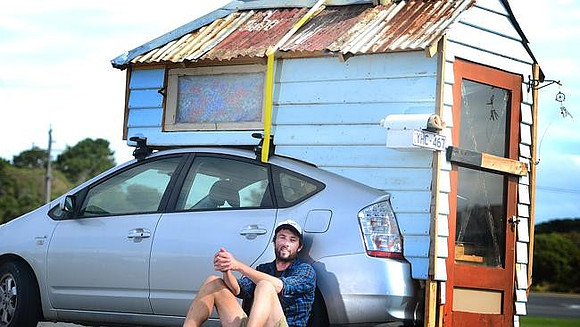
CLICK HERE to view a larger (1,800 vertical pixels) resolution version of this image. To read a previous blog entry about how I go about stacking the images, please CLICK HERE. To view more photographs of the school, please CLICK HERE. Prius Upgrade?Apparently, I'm not the only Prius camper out there. Thanks to Gregory Overcashier for bringing this to my attention. Although, I think I'll stick with my current set up!
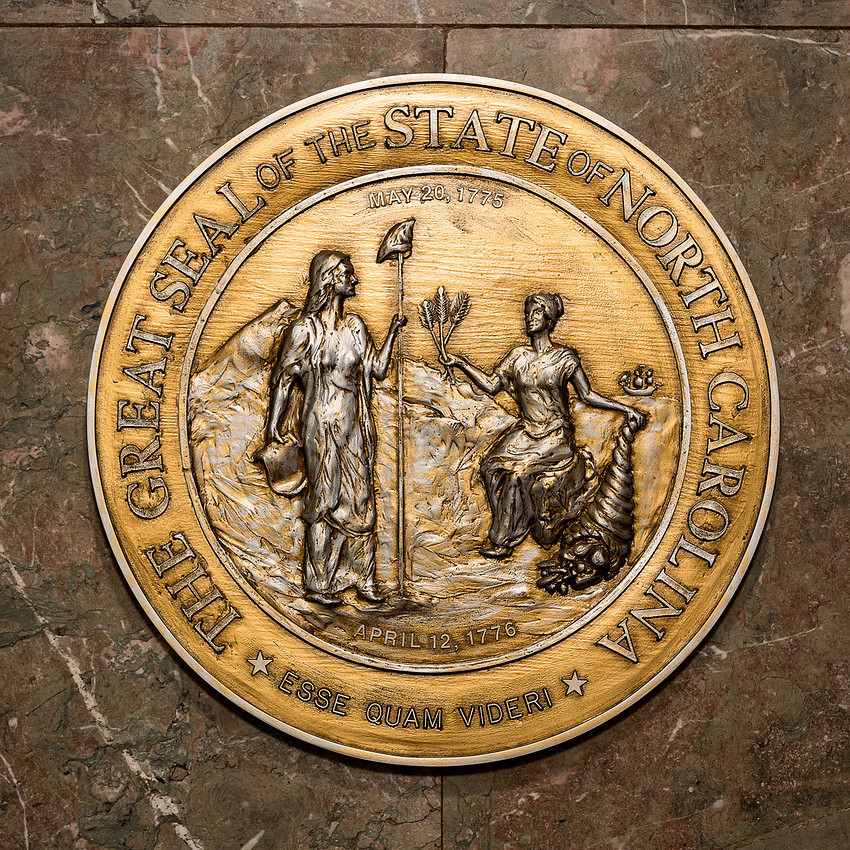
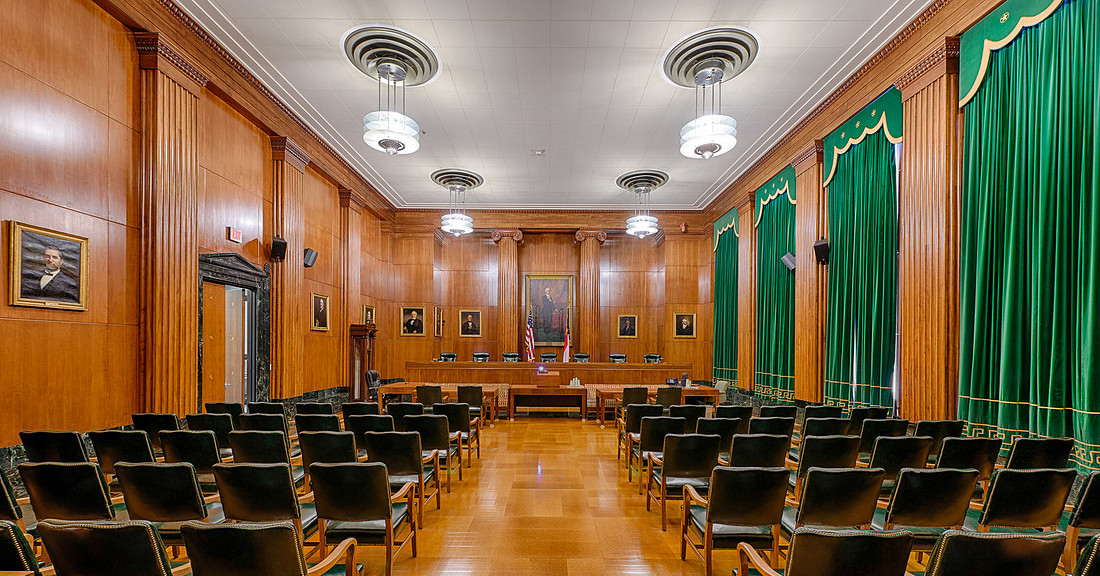
To read more about this, click here. Security Guard Has a Change of HeartWhile visiting the state capitols, I usually like to capture photographs of the state supreme courts as well. Sometimes, the historic supreme courts are located in the capitol building. Most times, the current courts are located in a nearby building outside of the capitol. In North Carolina, the state supreme court is across the street from the capitol building. The first time I tried to enter the building, the doors were locked. The next morning I was on the capitol grounds so I tried again. This time the door was open. After I entered the small lobby area, I asked the security guard if I could enter the courtroom for a few pictures. He said that the courtroom was closed. Court was not in session. I explained that I prefer an empty courtroom since photography is almost never permitted when the supreme court justices are present. He replied that he thought the courtroom was undergoing renovation and that visitors would not be permitted that day. He suggested that the state seal in the lobby might make for an interesting subject.
After a few minutes, the security guard had a change of heart. He called out to me that maybe he could escort me up to the courtroom. We could see if the room was under renovation or not. And, if I made it quick, he would give me time to capture a few photographs. With the security guard standing next to me, I took a couple of horizontal photos and one vertical picture of the courtroom. It was a little more time consuming than it sounds as each of the three photographs consisted of seven exposures to create images with greater dynamic range. After the 21 exposures, he mentioned that we better head back down to the lobby as he couldn't be away from his station any longer. On the way to and from the courtroom, I learned that the security guard has an interest in photography. He showed me a picture of the courtroom that he captured. His picture was far superior to mine as his photo has the justices posed behind the bench! It was his interest in photography that drove him to figure out a way for me to get my picture of the courtroom in the limited time that I was there. While I'm sure that the lighting fixtures in the courtroom are energy efficient, they certainly don't provide that warm lighting that is present in so many courtrooms throughout the country.
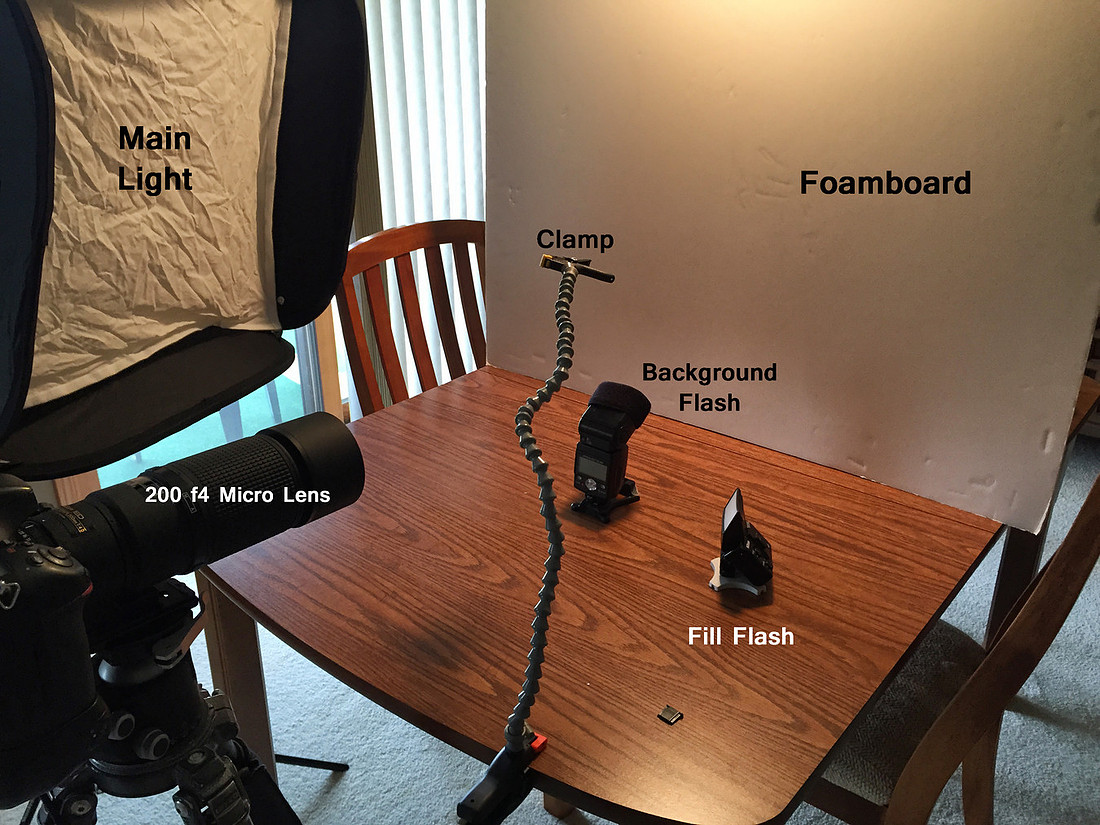
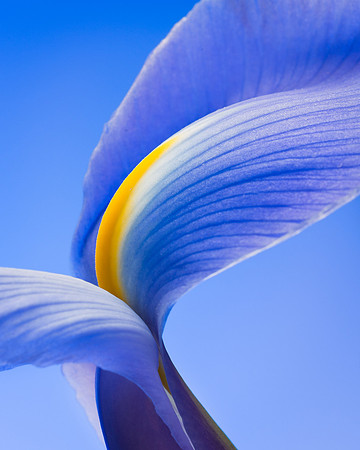
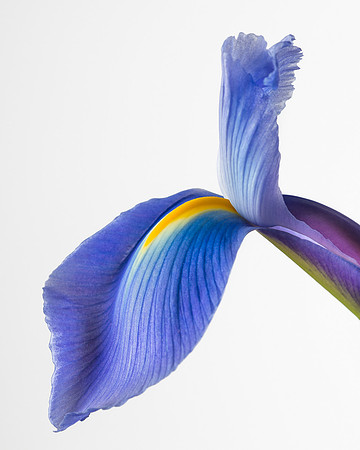
Buy a Photo Subject!I had the itch to photograph something the other day. But, I was having trouble identifying an interesting subject. While shopping for groceries at our local Jewel-Osco, I noticed some flowers for sale near the entrance to the store. The purple irises caught my attention. I like the combination of the colors (blue/purple and yellow). I also like the complexity of the structure of the petals. I am able to create more compositions of an iris than of some of the other flowers such as the daisies or carnations. So, I purchased some irises. One of the advantages of buying flowers is that I can then take them inside to photograph. Taking pictures of flowers indoors is much easier as there is no wind to deal with. Also, I can arrange the lighting in any way that I see fit. I created a mini studio in my living room:
CLICK HERE to view 9 pictures of the iris.
The "Pack Up the Gear" TrickI'm not sure why this happens so frequently, but many of my favorite animal pictures are captured after I thought my photo shoot was over. Many times, I'll observe an animal at an exhibit in the Brookfield Zoo--waiting for the animal to assume a particular pose or behave in an interesting way for a good photograph. This waiting game can take quite a while. It's not unusual for me to observe an animal for 30 or 45 minutes before some photo opportunities present themselves. Other times, I give up after a while. A good percentage of the time, the animal will suddenly begin doing something worthy of a photograph at the exact time that my camera/lens was packed! I watch the animal as I remove the camera/lens from the tripod, place the camera in the pack, fold up the tripod, zipper up the bag, etc. Many times, I have to put everything back in place to capture a few images. Fortunately, I have a lot of experience with my tripod and can get everything up and ready to go in about 15 seconds! This experience is not limited to animals in captivity. The most memorable experience with a wild animal was when I captured some photographs of a burrowing owl in Marco Island, Florida. I knew that these owls burrow in yards in the residential areas of Marco Island, so I drove 45 minutes to Marco Island in hope of photographing the owls. When I arrived, I could see mounds in lawns throughout the neighborhoods--which I assumed housed the owls. Yet, I never saw an owl! Finally, I decided to observe one of the largest and more promising looking mounds for a while. I secured my camera and large telephoto lens to my tripod and composed an image from a very low vantage point. The best way to achieve a clean background is by using a wide aperture and selecting a vantage point where the background is a good distance from the subject. By getting low, I avoided having more ground placed in the frame--which is closer to the subject than the distant field. Also, getting low makes this very small bird look more imposing. He stands at less than 12 inches tall! Now, all I needed was an owl! Since I already invested 90 minutes into a round trip drive and another 20 minutes into finding a promising mound, I figured that I would allow 30 minutes for an owl to appear. After 30 minutes, I finally gave up. I assumed that the owls had abandoned the burrow--or that they were resting and might not appear for several more hours. So, I packed everything up and walked back to my car--which was parked relatively close to the mound. As soon as I placed my bag back in the car, I heard noises coming from the mound area. Seconds later, the tiny burrowing owl appeared! While behind the car, I quietly got all my gear back in place. Then, I slowly worked my way toward the owl. I thought he would probably duck back into the burrow as soon as I got close enough for some shots. Instead, he let me get very close--and put on a good show for about 20 minutes of shooting.
|