|
I'll be posting some random thoughts here about my photography: my travel plans, technical information behind some images, stories about how certain pictures were captured, etc. The timing of the postings will also be random as my priority is capturing new images rather than writing about existing ones. I hope you will feel free to comment on any of my postings and I appreciate you taking time to read my entries.

The Security Guard PhotographerYesterday, I visited the Palmer House in Chicago to photograph its lobby. The Palmer House opened its doors on September 26, 1871, but burned down just 13 days later in the Great Chicago Fire. It was rebuilt in 1875. One of my photography books pointed out that the Palmer House management may not allow you to shoot if you come in with a big camera or tripod. It suggested that you can usually get away with handholding a smaller camera and that with a small camera you have a better chance of not being hassled. So, I went with my tried and true method of "shoot first and answer questions later". I located a vantage point above the staircase on the north side of the lobby, quickly set up my tripod and started firing away. The problem is that the lobby was rather crowded. I was interested in capturing a number of exposures so that I could blend them together later during post processing to create a high dynamic range photograph. The high dynamic range image would allow me to retain more details in the light fixtures in particular. By the time I reached my third or fourth exposure, someone would usually walk right in front of the camera. I didn't have much before it appeared that security would become an issue. As I anticipated, it didn't take very long before a security guard approached me. He asked me what I was doing. When I started to explain that I hoped to capture a few photos of the lobby, he stopped me to elaborate that his question was regarding my choice of lens, how many exposures, and so forth. The security guard said that he was just getting interested in photography. With that implied permission to continue, I then spent the next 20 minutes waiting to get better shots--shots that were more carefully framed and with people positioned in a better way throughout the scene.
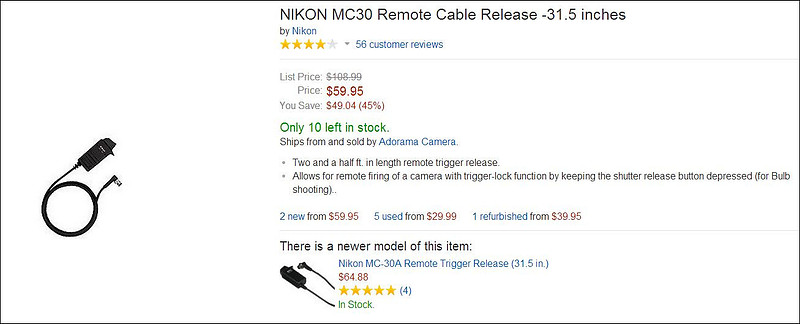
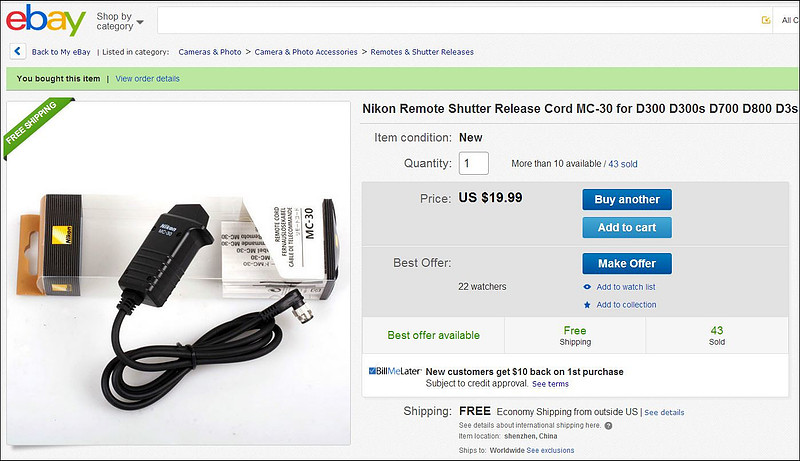
Worth the WaitWhen it comes to cable releases, good things come to those who wait! I use a cable release for the vast majority of my photos. The cable release helps ensure that pictures are as sharp as possible by removing one of the factors that contribute to camera shake. With the cable release, it is no longer necessary to touch the camera when making an exposure. Simply pressing the shutter button can cause enough camera movement to reduce sharpness. For years, I purchased very inexpensive third party cable releases off of eBay. These cable releases cost less than $5. The problem was that they would usually fail after a few months of use. Of course, they tend to fail at the worst possible times. One of my third party cable releases stopped working while I was shooting long exposure images in Capitol Reef National Park. I was hundreds of miles from the nearest camera store. When I finally arrived in Moab, my first stop was the town's only camera store. To my surprise, the store was closed for the Winter! While in Moab, I asked about cable releases in another store. The clerk said that they didn't sell the product, but offered to find someone in town who might be able to repair the wiring. A repair didn't sound like a good idea to me for an item that cost less than $5 to begin with! So, I finished that photo trip without a cable release. After that, I started carrying a back-up cable release with me. But, after ongoing failures I finally decided to try the more costly Nikon cable release. Another photographer assured me that the Nikon one was much more reliable. The Nikon cable release is much more reliable. I used this cable release for the past two years without incident until yesterday. Somehow, it appears that the pins were bent--and the cable release no longer works. When I got home, I placed an order for another Nikon cable release. Most of the major vendors that I typically use are charging about $60 plus shipping costs for the MC-30. Supposedly, that's a 45% discount from the normal price!
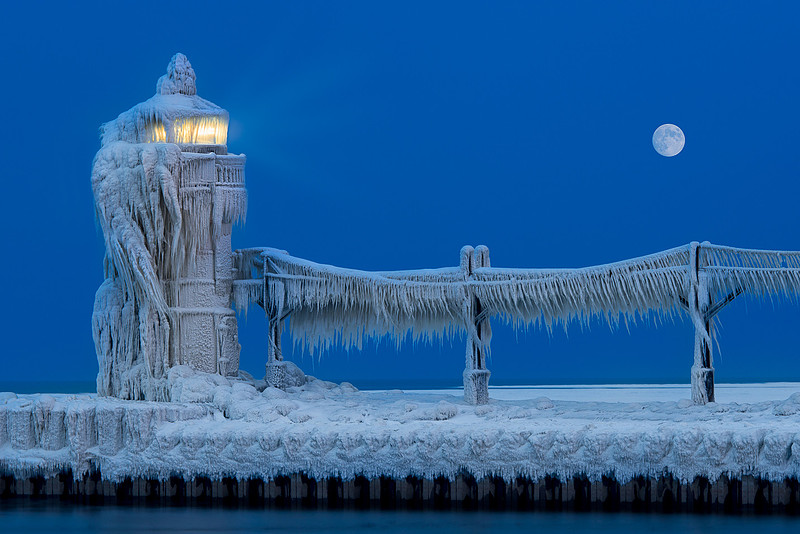
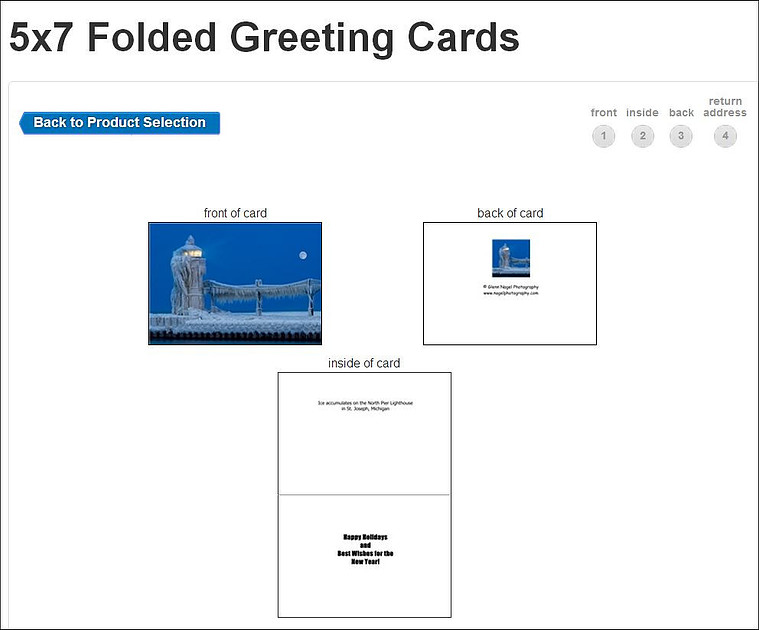
EDIT: Since I drafted this blog entry, the cable release arrived. It arrived in a little over one week from China! So, the wait wasn't all that long. Christmas Card PhotographyChristmas cards offer another opportunity to share photographs. For the past several years, I've ordered my cards from the Costco Photo Center. I like the 5x7 folding cards...and Costco's premium card stock paper is better than ever. I went with this photo for this year's card:
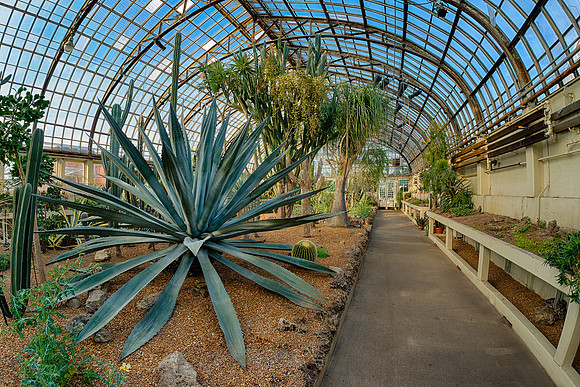
The Plant of the CenturyI visited the Garfield Park Conservatory in Chicago earlier this week. This was my first visit and I found the place to be most impressive. I've never seen such large greenhouses! This massive plant (lower left) in the Desert Room of the Garfield Park Conservatory is called a Century Plant. The Century Plant is said to bloom once a century. In fact, it blooms after a decade or two of growth. When it is ready, it sends up a single 30 foot stalk which produces an impressive bloom. So much energy is spent growing this flower that the plant dies shortly after.
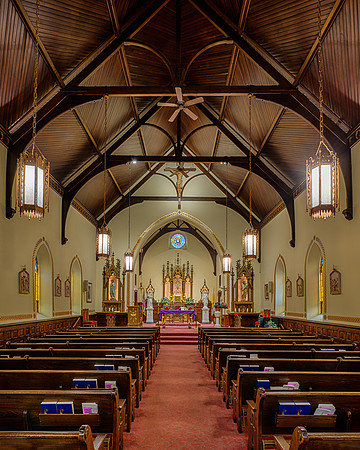
I'll have to plan a return visit when the Century Plant blooms--although that might not be for another decade or two! Click here to view the other 13 photographs from my visit. Right In My Own Backyard!The other day, a friend suggested that I might find a local church (St. James at Sag Bridge) to be of interest for a photo shoot. I wasn't familiar with this church. After looking up the address, I was surprised to learn that the church is just fifteen minutes from my Orland Park home. I've driven by the church countless times and never knew it was there! The church is located in the woods off a two lane road in Lemont, Illinois. The entrance to the church isn't obvious and the speed limit on the road is 55 mph. So, unless one is looking for the church it is very easy to miss. I'm glad that I found this church. The church was built in 1833, which is quite old for any building in the southwest suburbs of Chicago. In fact, St. James is the oldest parish in northern Illinois still functioning at its original location. The stones used to build this church came from the same quarry as the stones used to build the Chicago Water Tower. At first, I was disappointed to find that the doors of the church were locked. Fortunately, the deacon was in the office in another building on the grounds. He kindly agreed to open the church for me, but asked me to wait until he finished an errand. Twenty minutes later, I was standing out in front of the church in the freezing cold weather thinking that maybe he had forgotten about me. But, soon after that he opened the church doors and turned on all of the interior lights for my photo shoot. About five minutes into my photo shoot, the deacon started showing me photographs from more than 300 other Catholic churches in the Chicagoland area. As we were looking through the pictures, I was typing notes into my phone so I could later recall these opportunities for future architectural photography subjects. After twenty or thirty minutes of browsing through photos, the deacon announced that he had another commitment and needed to lock the church up in about five minutes. So, my total time behind the camera was limited to about 10 or 15 minutes! However, he invited me back to take pictures once the church is fully decorated for Christmas--which I understand is an amazing sight. Please click here to view 15 of the images from this session.
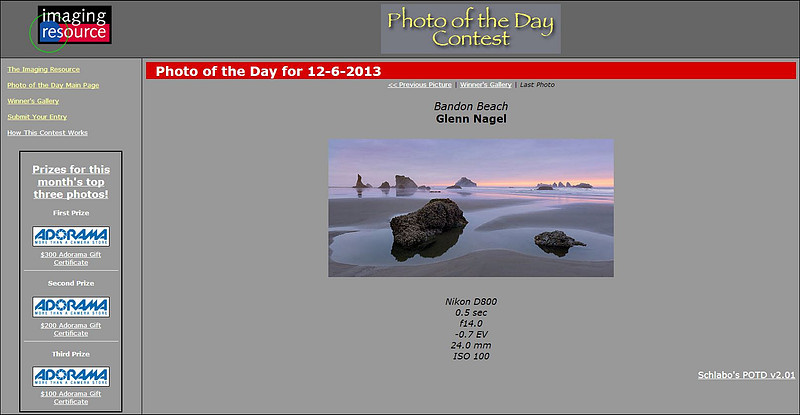
"Bandon Beach" Wins Photo of the Day!This morning, my "Bandon Beach" picture won Imaging Resource's "Photo of the Day".
This photograph was captured during my long road trip from Chicago to the Pacific Coast at Bandon Beach in Oregon on August 10, 2013.
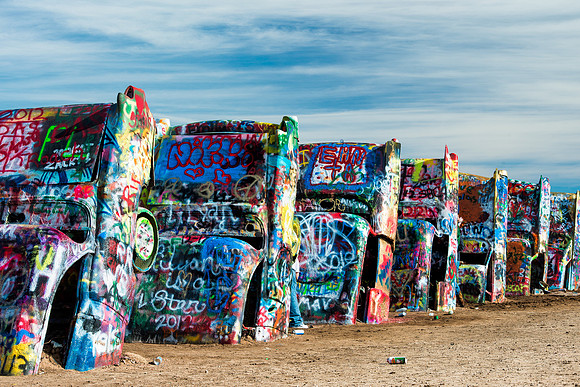
This marks the 13th time in the last 14 months that one of my photographs was recognized by Imaging Resource as its "Photo of the Day". The Clouds Are Your FriendsWhile driving by Amarillo, Texas, I came across an interesting scene in a cow pasture just off of Interstate 40. There is a row of old, brightly painted Cadillacs half-buried into the ground. Canisters of spray paint are laying near the cars and visitors are encouraged to decorate the cars as they see fit. This scene presents an interesting photography subject. However, bright sunshine and lingering tourists made capturing a good image very challenging. Bright reflections (specular highlights) appeared all over the cars. And, there was too much harsh contrast in the scene as well. Fortunately, there were some clouds in the sky that afternoon. So, I waited until the clouds moved in front of the sun while the remaining tourists were on the other side of the cars. The specular highlights were tamed and a better photograph was then a possibility.
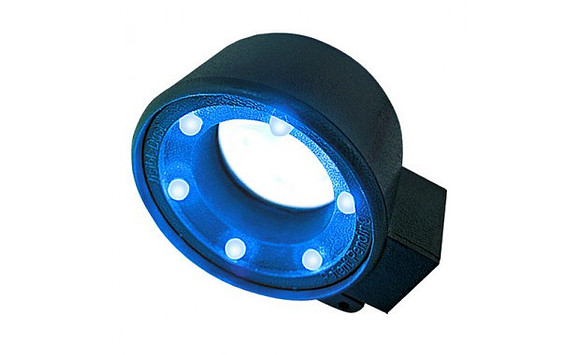
More often than not, I find that the diffused light that cloud cover provides helps make better photographs. Cleaning HouseFor someone who shoots as often as I do, keeping the camera's sensor clean is an ongoing challenge. I tend to change lenses often in the field which make matters worse. Initially, I didn't want to go anywhere near the sensor as I was afraid of doing permanent damage to my camera. After all, the camera manufacturers warn people not to ever touch the sensor. Of course, activating the automatic sensor cleaning function on my camera doesn't involve any risk. And, eventually I gathered the courage to expose the sensor and to use a Giottos Rocket Air Blower to keep my sensor relatively free of dust particles. But, there came a day when neither the automatic sensor cleaner nor the air blower would remove the particles from my sensor. So, I resorted to the dreaded wet cleaning method. This method requires applying a cleaning solution to a pad and then wiping the pad directly across the sensor. After my first swipe of the sensor, I reattached the lens to the camera, captured an image at f/22 and then inspected the results on my computer. My sensor was still an absolute mess. So, I tried again...and again...and again. After 15 attempts, the sensor was actually getting worse! The biggest challenge is not being able to see the particles on the sensor and the delay in getting feedback on the results of the cleaning attempt (i.e., having to take an image, upload it, and inspect it on the computer after each try). So, I brought my camera into APS (Authorized Product Service) in Morton Grove. APS did a nice job cleaning my sensor for $45 while I waited. This is a much better deal than using Nikon's Service Center in Melville. Nikon charges more for a cleaning and requires that my camera be shipped to New York. When using Nikon, I'm usually without my camera for the next two to three weeks. Yet, using APS is also a hassle--from the 60 mile round trip drive through the city to the hour long wait while the sensor is being cleaned. Worse yet, my sensor was dirty again three months later! So, after shooting with digital cameras for the past 7 years, I decided that I finally needed learn how to clean my own sensor. One tool, the Visible Dust Quasar Sensor Loupe 7x has made the cleaning process possible for me.
Here's a summary of my first attempt at cleaning the sensor using this loupe:
I now have a clean sensor! The sensor solution and swabs aren't cheap, so my sensor cleaning process came at a $9 cost (3 wet pads). But, I completed the job in less than 15 minutes. This was a much better driving to APS or shipping my camera to Nikon. Either of those approaches is far more costly and results in weeks of downtime for my camera or a long drive to APS. Most of the time, it should take less time to clean my sensor and at a lower cost. The vast majority of the time particles are more easily removed by using just the air blower...or perhaps the brush. The wet cleaning method will generally be an exception--to be completed twice a year and with fewer swabs for each cleaning. No Clamps Allowed!While planning for my visit to the Chicago Museum of Contemporary Art, I packed my camera bag with the assumption that my tripod would not be welcome at the museum. To stabilize the camera, I packed a Bogen Super Clamp.
But, I had my back-up plan in place. It wasn't quite as easy as I envisioned to get the clamp in a convenient spot, but eventually I got it there. I was able to squeeze off many photographs while getting all of the benefits of having the camera secured in place--low ISO setting of 100, multiple exposures for building HDR images, narrower apertures for greater depth of field, etc.
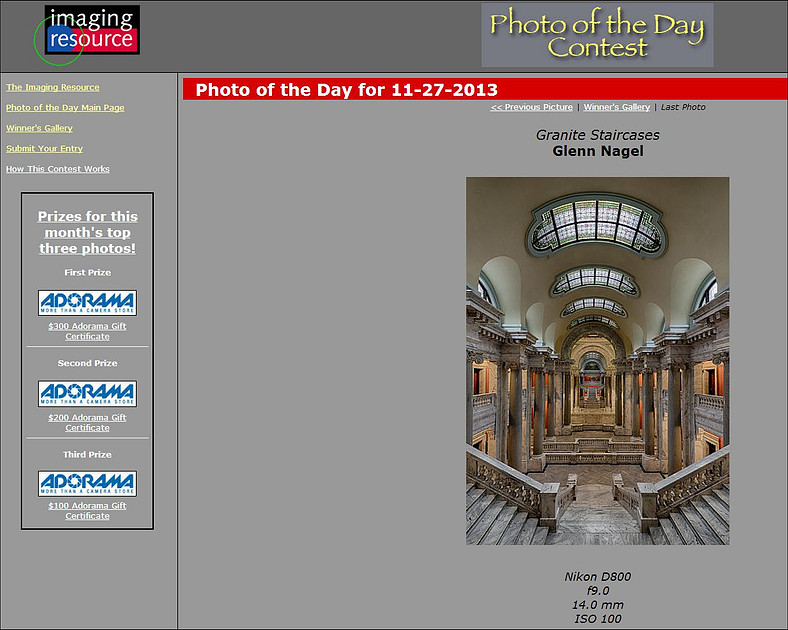
"Granite Staircases" Wins Photo of the Day!This morning, my "Granite Staircases" picture won Imaging Resource's "Photo of the Day".
This photograph was captured at the Kentucky State Capitol building in Frankfort on October 30, 2013. Unfortunately, I titled the picture as "Granite Staircases" even though the staircases are actually marble! It is one of my first photographs to be recognized with an award within less than a month of its capture.
This marks the 12th time in the last 13 months that one of my photographs was recognized by Imaging Resource as its "Photo of the Day". |