|
I'll be posting some random thoughts here about my photography: my travel plans, technical information behind some images, stories about how certain pictures were captured, etc. The timing of the postings will also be random as my priority is capturing new images rather than writing about existing ones. I hope you will feel free to comment on any of my postings and I appreciate you taking time to read my entries.

89 and CountingEarlier today, I scanned the photos in my website to determine how many places of worship that I've photographed. I found 89 so far!
Of all of the places of worship that I've visited, here are the... Most Unique
Igloo Church, Inivuk, Northwest Territories, Canada
Chapel of the Sacred Heart, Grand Teton National Park, Wyoming
Cadet Chapel, Air Force Academy, Colorado Oldest
San Miguel Chapel, Santa Fe, New Mexico
St. Francis Cathedral, Santa Fe, New Mexico Most Accommodating Several churches compete for this category. However, the people in three churches in particular went above and beyond to ensure that I could capture photographs of the interiors.
Annunciation Byzantine Catholic Church, Homer Glen, Illinois
Cathedral of the Madeleine, Salt Lake City, Utah
San Lorenzo Church, Picuris Pueblo, New Mexico Least Accommodating Only a few places of worship prohibited photography or made it very difficult.
Baha'i House of Worship, Wilmette, Illinois
Basilica of the Sacred Heart Cathedral, South Bend, Indiana Favorite Exterior
San Francisco de Asis Mission Church, Ranchos de Taos, New Mexico I plan to visit many more churches in the near future! Going FishingI visited a few Chicago locations to test my new Sigma 15mm fisheye lens. First up was the Fourth Presbyterian Church on Michigan Avenue. I deleted those fisheye images since I didn't like the extreme distortion of the vertical lines for this particular subject. I found the Nikon 14-24mm lens more to my liking for this photo shoot:
Next up was Water Tower Place. The fisheye certainly brought more content into the frame:
My last stop of the afternoon was the Museum of Contemporary Art. The fisheye really came in handy for this location. The extremely wide perspective (180 degrees) of this lens enabled me to capture images of the staircase that otherwise would not have been possible:
Entering the World of FisheyeShortly after purchasing the Nikon 14-24 2.8 lens, I had second thoughts about the purchase. I was using the lens so infrequently that I wasn't even putting it in my camera bag for most outings. However, after more time passed and I became more experienced shooting from an ultra-wide perspective, the 14-24 became one of my favorite lenses. In fact, during my recent road trip from Chicago to the Pacific Coast, the 14-24 was my most frequently used lens! Although the 14mm focal length certainly provides a very wide perspective when used with a full frame sensor, I'm finding many situations where an even wider perspective would be helpful--especially while shooting the interiors of many of the places of worship and state capitol buildings that I've visited. So, I just ordered a Sigma 15m fisheye lens. This lens will provide an extremely wide perspective. The perspective is so wide that distortion will make keeping lines straight challenging or impossible at times. Some have suggested that a better solution than purchasing a lens would be to stitch multiple exposures into a panoramic image to extend the scene. The issue that I have with the stitching approach is that I'm already blending 5 to 7 exposures to create a high dynamic range photograph as it is. If I were to then stitch three such images together, I'm now looking at 15 to 21 exposures to make a single photograph. Not only does that number of exposures add to the capture and processing time, but things tend to change within the scene over time--such as people entering or leaving the frame. Then, there's the issue of storing that many files on a regular basis. I understand that getting good images from the fisheye lens will take practice. I hope that the experience I've gained over the past two years shooting at 14mm will accelerate my learning curve. I hope to be sharing some interesting fisheye photographs in the near future. Put Things Back Where They Were!Whenever I'm out taking pictures, I always try to remember to put the camera settings back to my default positions. Fortunately, I shoot a lot, so it's not often that I forget about a setting. But, I often hear other photographers express disappointment when they forget about a setting. For example, not long ago a photographer mentioned that he forgot to set his ISO back to the base setting of 200. Instead, he took pictures all day at ISO 1600--diminishing image quality for no reason. Even though I take pictures quite often, I'm not immune to making similar mistakes. During this last photography trip to the Pacific Coast and back, there were two occasions where I forget about my settings: #1) The last picture I shot one day was on the St. John's Bridge in Portland, Oregon. The pedestrian walkway on the bridge was too narrow for me to use my tripod. So, when I captured this image of a latch on the other side of the bridge, it had to be handheld. Given the longer focal length and the windy conditions, I increased the ISO from 100 to 800. Here's the image:
This image on the bridge wasn't the problem. The problem was that I forgot to change my ISO back to 100 after the shot. The next morning, I captured a series of images both inside and outside the Oregon State Capitol in Salem--and they were all captured at ISO 800! Here's one of those images:
Of course, ISO 800 isn't the end of the world with the modern sensors. But, it's an unnecessary compromise in image quality for no reason considering that all of the Oregon State Capitol photographs were captured with the camera secured to a tripod. I went back and captured all of the Oregon State Capitol photographs again at ISO 100. But, I couldn't capture the outdoor photographs again as the lighting conditions had deteriorated. #2) While shooting the Salt Lake Temple, I attempted a HDR photograph consisting of three exposures. What I failed to realize at the time is that I had turned off the bracketing feature before starting the sequence. Fortunately, after four or five series of "bracketed" photographs, I checked the histogram on the back of the camera and noticed that the exposures were all identical. I then activated the bracketing feature and kept shooting. This error didn't hurt me at all as the light continued to improve, so the previous bracketing sequences would have been deleted in any event.
Having captured over 4,400 exposures on this trip, this was the extent of the errors I made with my settings. By making it a habit to always reset the camera/lens after every series of photos, the possibility of error is minimized. These are the default settings that I dial in after every shoot:
A Colorful ChallengeWhile visiting the Kentucky State Capitol building in Frankfort last week, I experienced an unusual challenge in my attempt to capture accurate colors. First, when taking pictures of the Capitol dome interiors, I'm usually laying on the floor in an awkward position trying to get everything aligned with the camera positioned on a tripod. Sometimes, the camera is so close to the floor that I can't even use the viewfinder. I rely on the Live View feature of the Nikon D800. Then, I usually take multiple exposures to create a high dynamic range image. While taking this picture of the statue of Abraham Lincoln underneath the dome, I was having trouble capturing consistent colors. It seemed that the color of the dome was changing from shot to shot. At first, I figured I could just deal with it later by adjusting the white balance settings during post processing. But, this wasn't a white balance issue! Over the next two hours or so, I went on to shoot several other rooms within the Capitol building. I forgot about the color issue that I experienced on my opening shots within the rotunda until later when I participated in the formal tour. During the formal tour, the guide explained how the lighting of the dome's interior is programmed to slowly change colors. I then noticed how the color of the dome slowly transitioned from brown to green to blue to pink. To create my high dynamic range photographs, I am blending five to seven exposures together. These exposures are captured over a period of time during which the color of the dome is changing. When I blend the exposures, I never know what color I am going to get! For this particular photograph, I ended up with pink.
Texas Trip ItineraryI'll be traveling by car to Texas for my next photography trip. My preliminary itinerary follows: Day 1- Miami, OK Day 2- Glen Rose, TX (Fossil Rim Wildlife Center) Day 3- Austin, TX (Texas Capitol, Auditorium Shores) Day 4- San Antonio, TX (Missions Historic Park) Day 5- San Antonio, TX (Missions Historic Park) Day 6- San Antonio, TX (Alamo, San Antonio Zoo, SA Central Library) Day 7- Rio Grande Valley (San Juan Basilica) Day 8- Rio Grande Valley (Santa Clara Ranch) Day 9- Rio Grande Valley (Santa Clara Ranch) Day 10- Baton Rouge, LA (Louisiana Capitol) Day 11- Jackson, MS (Mississippi Capitol, Old Mississippi Capitol) Day 12- Little Rock, AR (Old Mississippi Capitol, Governor's Mansion) Day 13- Little Rock, AR (Arkansas Capitol, Old State House) Day 14- Little Rock, AR (Clinton Presidential Library, Central High Museum) Day 15- Orland Park, IL Of course, this trip includes more visits to State Capitols (4 of them to bring my total to 27). It also includes churches, a college campus, libraries and other landmarks. While in the Rio Grande Valley near the Mexican border, I'll be hiring a guide to assist me in capturing photographs of some Texas wildlife---mostly birds and small mammals. Most recently, I added a one night stay at the Fossil Rim Wildlife Center. The facility is known as a top destination for wildlife photographers who aren't able to travel to Africa. I'll be staying in a "tent" near a watering hole for early morning wildlife photography. Overall, the trip covers just under 3,500 miles--a cakewalk compared to most of my recent journeys! Unfortunately, Prius camping will not be part of this adventure. The early sunset times (before 6:00 pm) during January are not conducive to spending extended times in the smaller space. Instead, I'll be at my favorite lodging chain (Hampton Inn) for 10 of the 14 nights. Then, 1 night at Fossil Rim and the remaining 3 nights at the Guesthouse of the Santa Clara Ranch. A Vacation from a Vacation!I had some free days last week, so I made a last minute decision to visit the Bluegrass Region of Kentucky. My itinerary included a stop in Cincinnati to visit a church on the drive to Lexington on Monday. I photographed various subjects in Lexington and Frankfort on Tuesday and Wednesday before driving back to Orland Park on Thursday. Click here to view my favorite images from this trip. Most of my photography trips are very hectic. Let's just take a look at one day (Wednesday) of this short trip:
This is a fairly typical day for one of my photography trips. Some trips provide more challenging days. During my recent trip to the Pacific Northwest, the days started much earlier (as sunrise is was a couple of hours earlier in the summer) and ended much later. Then, there's all of the post processing after the images are captured. Once I return home from one of these trips, I feel like I need a vacation! Here is an image from each stop along the way during this Wednesday in the Bluegrass Region of Kentucky: State Capitol
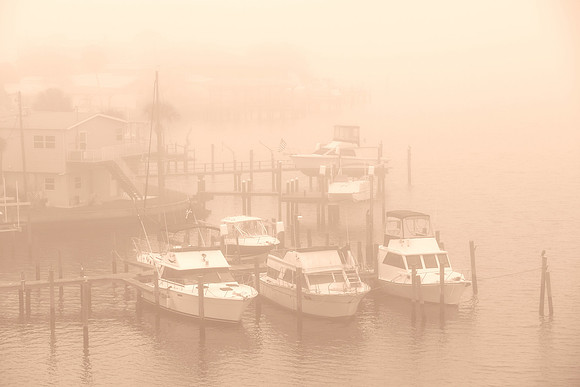
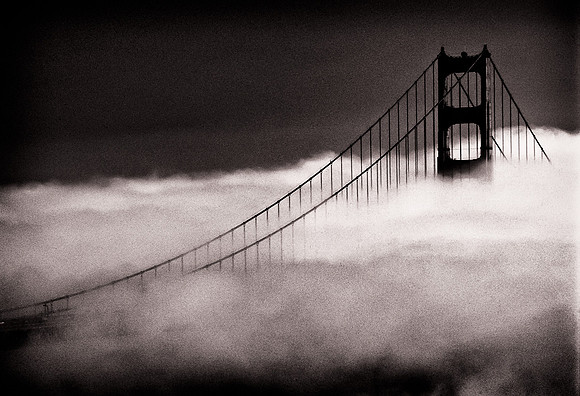
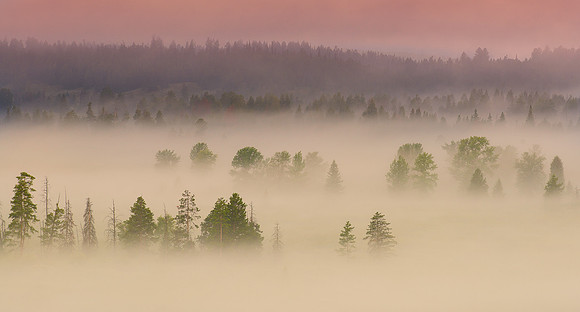
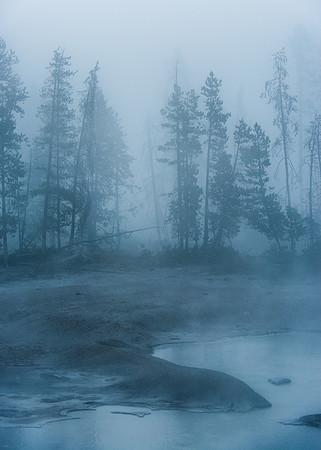
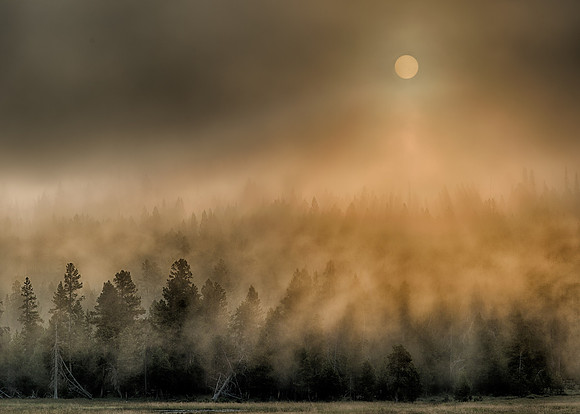
Fog and MistOne of my favorite things to photograph is foggy scenes. Fog has the power to turn ordinary scenes into surreal images. St. Petersburg, Florida
Yet another from Yellowstone...
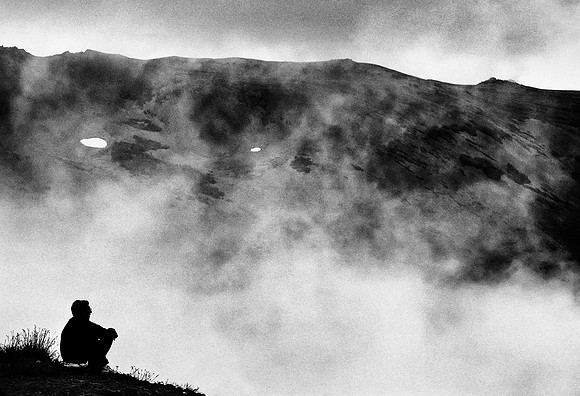
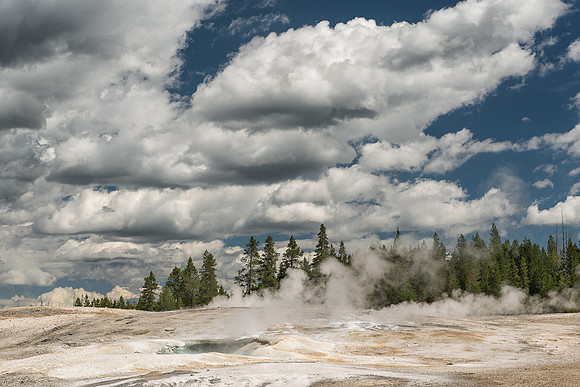
One of my favorite and most unusual landscape photographs was captured at the Norris Geyser Basin in Yellowstone National Park. What made this photo different was that the "foggy" or misty conditions that occurred in the middle of the day--due to its geothermal source.
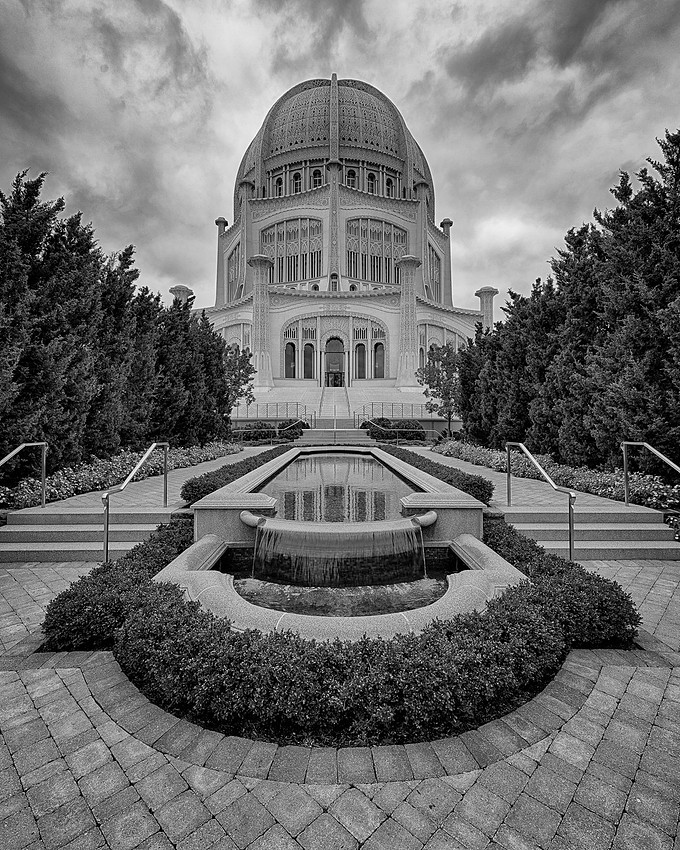
It's What's On The Inside That Counts!Despite living in the Chicago area nearly my entire life, I visited the Baha'i Temple for the first time last week. I have photographed many places of worship throughout the country over the past few years. Some of my favorite images from these places of worship may be viewed by clicking HERE. Until my visit to the Baha'i House of Worship in Wilmette, Illinois, I was welcome to photograph the interior of every church and temple that I've visited. Upon entering the Baha'i Temple, I was told that photography was permitted in the building--with the exception of the temple! In other words, I was free to take all the pictures I wanted of the "visitors center" and corridor leading to the restrooms! I respect the fact that the temple is private property and that I have no right to photograph the interior. However, this is the first time I've experienced such a policy in a house of worship. It's very frustrating to be standing at a location with a camera in my hand, but not be allowed to press the shutter. The woman who greeted me told me that there was no need to be disappointed. In 45 minutes, the gift shop would open and the most beautiful postcards are available for just 49 cents. This wasn't what I hoped to hear after driving for 90 minutes through city traffic to reach the temple. Basically, the Temple is a 3 hour round trip drive from my home in the southwest suburbs of Chicago. So, I captured a couple of images of the exterior and then drove home.
If it is true that "it's what's on the inside that counts", then I wish I was able to capture photographs of the inside of the Baha'i House of Worship! Saving EverestFour months ago, a snow leopard cub named Everest was born at the Brookfield Zoo. After he reached about three months of age, Everest started entering the exhibit for public display. I visited the exhibit four times before I finally saw Everest and his mother. Much of the time, the snow leopards decide to remain indoors where they can't be seen. I was excited about the opportunity to capture some pictures of the cub. However, unlike most of the exhibits at the Brookfield Zoo, there's thick glass or netting separating the animals from the visitors at this exhibit. Most of the other exhibits use moats for this purpose, which makes it possible to capture high quality images since there are no obstructions between the lens and the subjects. I chose the lesser of two evils and decided to shoot through the glass rather than the netting. My approach was to remove the hood from the lens which allowed me to press the lens as close to the glass as possible. The following image (as it appeared straight out of the camera) is the best picture I could produce through the glass:
So, I tried to salvage this photograph during post processing. In Lightroom, I made the following global adjustments:
Once those adjustments were made, I brought the image into Photoshop to apply some more selective adjustments. These adjustments were brushed only onto Everest's face:
After all of these adjustments, I liked the photograph enough to post it on my website and to share it on Facebook and some photography forums. But, I knew that none of the adjustments would "fix" the image quality issue. Image quality must be achieved at the time of capture. Post processing is best for enhancing images. It rarely is able to fix a broken image. Therefore, I wasn't surprised in the least when the stock agencies quickly rejected this image for image quality considerations. Here's the final result:
| |||||||||||||||||||||||||||||||||||||||||||||||||||||||||||||||||||||||||||||||||||||||||||||||||||||||||||||||||||||||||||||||||||||||||||||||||||||||||||||||||||||||||||||||||||||||||||||||||||||||||||||||||||||||||||||||||||||||||||||||||||||||||||||||||||||||||||||||||||||||||||||||||||||||||||||||||||||||||||||||||||||||||||||||||||||||||||||||||||||||||||||