|
I'll be posting some random thoughts here about my photography: my travel plans, technical information behind some images, stories about how certain pictures were captured, etc. The timing of the postings will also be random as my priority is capturing new images rather than writing about existing ones. I hope you will feel free to comment on any of my postings and I appreciate you taking time to read my entries.

168 School BusesI visit the Brookfield Zoo quite often to practice my photography. But, I usually limit my visits to the months of October through March to avoid the crowds. During the Winter, I sometimes have almost the whole zoo to myself. In fact, during one visit on a particularly cold Winter day, there were only two other people (a woman with a baby in a stroller) there! However, I really wanted to capture some photographs of the sloth bear cubs. The cubs were born in January of this year and were recently introduced to the outdoor exhibit space. So, I risked a May visit to the zoo. Unfortunately, the cubs never came outside during this visit. I returned to the zoo a few days later. This time, the cubs made an appearance about 30 minutes after my arrival. The bigger challenge was dealing with the crowds. As I entered the zoo, I said to the employee at the entrance that I was guessing there had to be a hundred school buses in the parking lot. He corrected me and said that there were 168 school buses out there! Given that most of the school buses hold 75 students, there were at least 12,000 kids running around the zoo--not to mention the ones who were visiting outside of the field trips. Taking photographs under these conditions is not easy. Kids are running under and into the tripod while screaming at the top of their lungs. As a result, I had to grab the tripod at the most inopportune times--missing several peak moments. After a couple of hours, I was able to capture a number of keepers, including these three photographs:
Light from the Side for TextureThe cold temperatures continue to linger well into March here in the Chicago area. Rather than brave the cold again, I decided to stay in the house. My photo subject was an old baseball. As a long-time youth baseball coach, I probably have at least 200 of these baseballs in my garage! The setup for this shot was simple. I sat the baseball on a desk and lit the subject with a desk lamp. My camera (Nikon D800) was secured to a tripod. I selected a macro lens--the Nikon 105VR. I also stacked three Kenko extension tubes between the lens and my camera to enable to lens to focus from a closer distance. For shots like this--where the subject isn't moving--I always set the camera for mirror lock-up and use a cable release to trigger the shutter. That way, I remove the possibility of any camera vibration from pressing the shutter. I wanted as much of the baseball to be in sharp focus as possible, so I selected a very narrow aperture of f/29. Using this small aperture, a shutter speed of 0.6 seconds was required to achieve the desired exposure at the base ISO setting of 100. I always use the camera's base ISO setting for stationary subjects in order to maximize image quality. Since this is an old baseball, I wanted the emphasis of the picture to be on the texture of the seams and the cover of the ball. To highlight the texture, I moved the light (the desk lamp) to the side of the baseball. By side-lighting the subject, every little piece of elevated leather cast a shadow--making the baseball's cover appear rough. If I had moved the light to the front of the ball and lit it from the position of the lens, the light would have filled in most of the shadows and made the baseball appear smoother.
To Fill Flash or Not to Fill Flash...That is the QuestionEarlier this week, I captured a series of photographs of a female orangutan at the Brookfield Zoo. Although this animal is housed in an indoor exhibit, the light streaming in from the skylight of Tropic World was a little harsh and introduced more contrast into the picture than I wanted. At first, I secured my camera/lens to a tripod and dialed in an appropriate exposure (1/40th @ f4, ISO 800). Here is the result:
A Simple DandelionI captured this image of a single dandelion the other day.
It's just a simple dandelion; yet I used three flash units to create the photograph:
I used the Nikon D800 camera and Nikon 200 f/4 Micro lens for this picture. The exposure is 5 seconds, f/20 at ISO 100. Given that the room was quite dark, any shutter speed faster than 10 seconds removes any trace of ambient light--leaving the flash units to provide the entire exposure. Of course, the camera/lens is secured to a stable tripod. Changing the gel color of the background light quickly provides a different background color with very little effort:
Eerie LakefrontToday's camera sensors require very little light to record colors and details. I noticed this ice-covered marker while walking on the South Pier off Silver Beach in Saint Joseph, Michigan. It was well after sunset and I could barely see the structure! I attempted to auto-focus by positioning the focus point on one of the blinking red lights at the top of the marker. I used the Nikon D800's Virtual Horizon feature to level the camera since I could barely see the horizon. For exposure, I selected a middle aperture of f/8 to ensure that the pier marker would be sharp. I had to boost my ISO to a manageable 400 to keep the shutter speed at 30 seconds. As always, I set the camera for Mirror Lock Up and used a cable release to trigger the shutter without risking vibration. And, I set the Long Exposure Noise Reduction to ON to minimize any noise that might get generated from heat building up on the sensor from a long exposure. Given that I couldn't see any colors or details with my eyes in the darkness, I was surprised to see what the camera had captured during this long exposure. Later, I added the moon (which I photographed on a separate evening) to add some interest and balance the composition within the frame. I also used a Photoshop brush to paint in the red light flares at the top of the monument. I think the final image takes on a surreal, otherworldly look:
Waiting in Line for a LandscapeWhile visiting Niagara Falls, I hoped to capture photographs of the falls at sunset and sunrise. My first photo shoot was at sunset. I arrived at the Horseshoe Falls on the Canadian side about 90 minutes before sunset. It's a good thing that I got there early. I noticed that the tall buildings on the Canadian side of the falls would block the light from hitting the water once the sun dropped much closer to the horizon. I found that it was better to start shooting earlier in the evening than I had planned. Also, the place was packed with tourists. I literally had to wait in line to secure a spot along the wall to have a clear view of the falls! I estimated that the wait was 20 minutes before I could position myself for a shot. Even then, I had people bumping into me and kids crawling under my tripod throughout the shoot. This did not make for the most pleasant landscape photography that I've ever experienced. In any event, I eventually captured a few images with this one being one of my favorites:
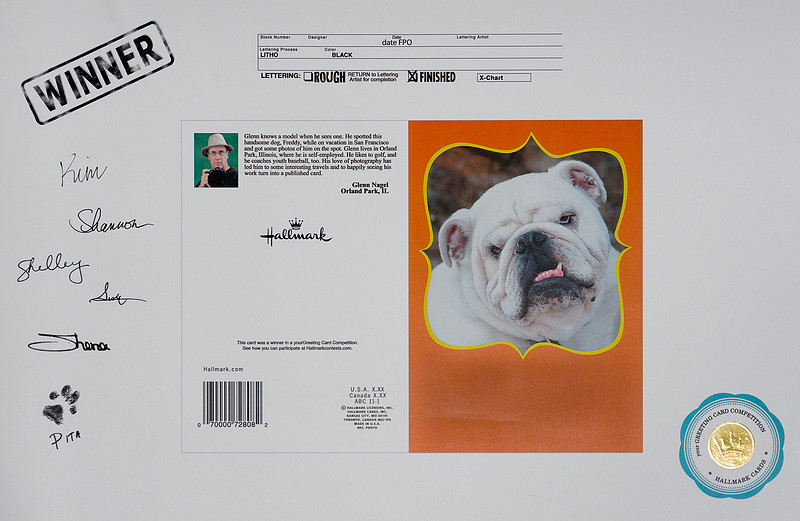
Niagara Falls is a spectacular location for photography. If you visit, I think you'll find the morning shoots to be far more enjoyable than the evening ones. Bulldog Photo to Appear in Stores!Just over two years ago, I came across a bulldog named Freddy while walking a path in Randall Park in San Francisco. I asked the owner for permission to take a photograph of the dog.
Later, the picture was selected as a winner by Hallmark in its "Your Greeting Card Competition". As a result, the card became available for online purchases. After six months of so, Hallmark assesses the level of interest in the online cards before determining which ones will be offered for sale in stores around the world. Yesterday, Hallmark notified me that my card was selected for in-store sales and that the card will be available in stores after June 21st. In addition to a $500 check, Hallmark also sent me the original pre-production flat:
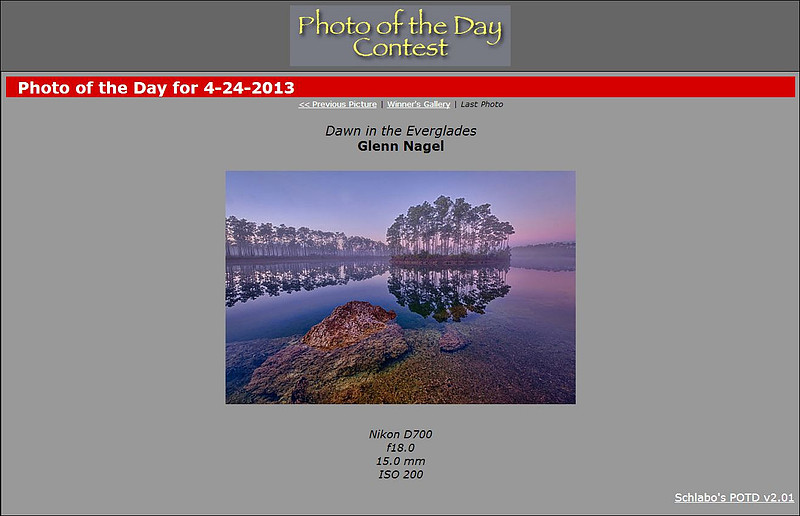
"Dawn in the Everglades" Wins Photo of the Day!This morning, my "Dawn in the Everglades" won Imaging Resource's "Photo of the Day".
This photograph was captured just before sunrise on January 23, 2012. I camped very close to the shore of Long Pine Key Lake in Florida's Everglades National Park--so close that you would see the campground in the distant trees if I hadn't cloned out most of the vehicles from the frame. I arrived at the campground the afternoon before taking this photograph and noticed this scene while walking a few of the trails that surrounded the campground. I woke up early the next morning and walked around the pond with a flashlight in the dark to this spot which I scouted from the day before. I hoped to catch a few breaks during this photo shoot. Ideally, there wouldn't be any wind so the water would be still for better reflections. I also wanted a morning fog and some great color. Fortunately, I got all three of those things on that winter morning in the Everglades!
This marks the sixth consecutive month that one of my photographs was recognized by Imaging Resource as its "Photo of the Day". A Rainy Day in AlamogordoThe weather was unseasonably warm and dry during my three week trip to New Mexico in December. This was helpful from a photography perspective as there were far less people in some of the resort areas. Communities like Taos count on skiers to visit in December. But, with no snow on the ground, skiers cancelled their trip. The weather remained dry and warm until I arrived in Alamogordo, New Mexico. I stayed in Alamogordo for a few days while visiting nearby White Sands National Monument. The day I arrived in Alamogordo, there was high winds (in excess of 40 mph) and rain. Windy conditions were a blessing. The ranger at White Sands told me that it had been several weeks since the area experienced high winds. Without wind, the footprints from visitors remained in the sand. Photographers had to hike great distances in the sand to reach a point where the sand was clear of footprints! After those strong winds (which served as footprint erasers), I was able capture photographs like this one of clean ripples in the sand just a few feet from the road:
However, while it was raining, my opportunity to capture photographs was limited. I ended up looking for things around town that might benefit from the diffused light. One thing that caught my eye while driving through town was this colorful garage door with the three (or is it twelve) screened windows:
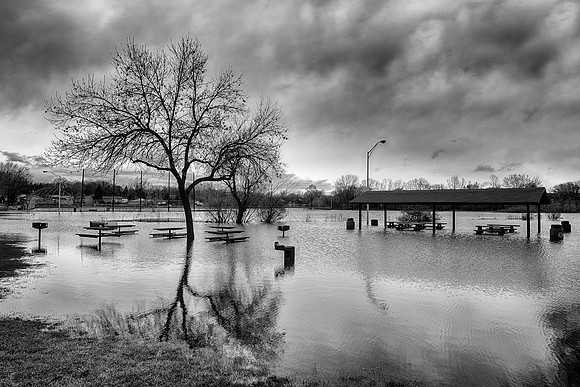
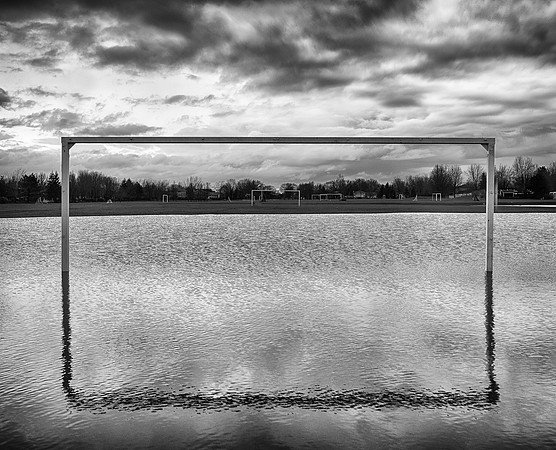
Baseball on HoldAlthough photography is one of my favorite pastimes, the activity I enjoy most is coaching youth baseball. I've managed youth baseball teams for more than 25 years. In recent years, I've dedicated more time than ever to baseball--coaching two teams in the Spring and another in the Fall. The weather in Chicago is always suspect during the early part of the Spring baseball season. Often, it is cold and windy. Rain is also usually a part of the mix. But, so far this season has been the most challenging in terms of the weather. For most of April, all baseball activities have been cancelled due to continuous rain. Earlier this evening, I did a field assessment at one of our parks. I knew that there was no chance that the fields would be playable by tomorrow. I am more interested in determining if the fields might have a chance to be playable at all during the weekend--or at least by early next week. Things aren't looking good!
|