|
I'll be posting some random thoughts here about my photography: my travel plans, technical information behind some images, stories about how certain pictures were captured, etc. The timing of the postings will also be random as my priority is capturing new images rather than writing about existing ones. I hope you will feel free to comment on any of my postings and I appreciate you taking time to read my entries.

Shoot Low for a More Interesting PerspectiveYesterday, I visited the Chicago Botanic Garden. Often times, I positioned the lens just inches from the ground in an attempt to create a more interesting picture. Everyone is so accustomed to viewing the world from eye level that simply moving the camera to a much lower or higher position can help make a photograph different. Here are a couple of examples:
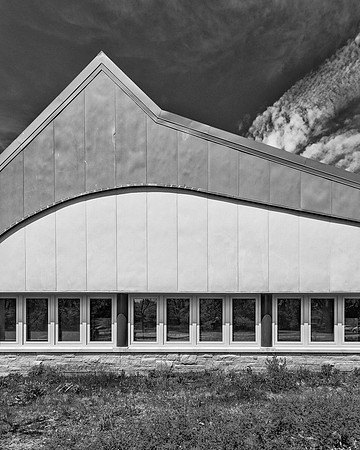
Of course, shooting from a high vantage point will also add interest to many photographs. The Old and the NewYesterday, I visited the Little Red Schoolhouse near Willow Springs, Illinois. The original schoolhouse, constructed in 1886, still stands. Located directly next to the old schoolhouse is the new nature center. I captured images of both buildings and then converted them to B&W. My intention was to convert each photo appropriately to reflect the old and the new: The Old
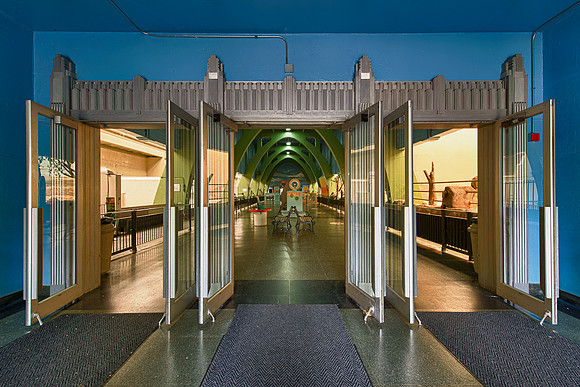
Moving Just a Few FeetYesterday, I captured some photographs of the old Pachyderm House at the Brookfield Zoo. After taking the first image from just inside the building, I back up a few feet and noticed that the image looked much different when framed with the doors. I took a couple of more from different vantage points. All four photos were taken within 20 feet of my original spot. Sometimes it pays to move around a little while taking pictures! 1: First picture from just inside the doors
3: And a few more feet back
Tripod...Whenever PossibleWhenever possible, I use a tripod while taking photographs. The tripod provides several important benefits:
Given all the benefits, I find myself using a tripod for well over 90% of my photographs! And, the more often that I use the tripod, the more proficient I become at getting it set up quickly and in tight spots! Now, I can set up my tripod and have my camera ready to go in less than 10 seconds!
For a tripod to be useful, it must be stable and able to handle the weight of the gear. My first tripod was a very inexpensive one. I quickly learned that it wasn't preventing camera shake, so I upgraded my tripod. Although the second tripod was better than the first, it was cumbersome and still not very stable. My third tripod was a monster--very stable, but too difficult to carry very far. Finally, I purchased the ideal tripod. Although it was expensive, it will be the last tripod that I should ever have to buy. It's the Gitzo 3540XLS Systematic 6X Carbon Fiber tripod with a Markins M-10 ballhead. The tripod is stable, relatively light and can be adjusted so that it is very low to the ground or very tall (which is convenient given that I'm 6'3" tall). All of my gear is Arca-Swiss compatible, so I can attached lenses or cameras to the tripod within seconds. I also have a L-bracket on my camera to make shooting vertical compositions very easy with the tripod. I wish I would have read Thom Hogan's tripod article earlier as it would have saved me a lot of money and hassle!
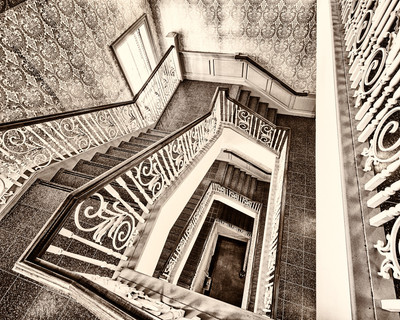
Yesterday, I faced a situation which challenged my ability to position the tripod. I was on the fourth flight of stairs at the Illini Union. The photograph of the staircase from above required that my new D800 camera hang over the railing. At first, I tried handholding the shot. But, I realized that using the tripod would allow me to get enough depth of field and that I could also lower the ISO setting to maximize image quality. So, I adjusted each leg of the tripod to a different height on the stairs to get the camera into proper position.
Amazing ResolutionEarlier today, I noticed an interesting store while driving north on Harlem Avenue through Bridgeview, Illinois. I stopped to take a few pictures of the exterior of the building. While I was shooting, the owner of the store came out of the building and approached me. I was expecting him to be upset that I was taking pictures of his property. Instead, he was pleased that I found his store to be an interesting subject.
The owner then invited me to take as many photos of the interior of the store as I wished. I learned that Benko Lamps (7400 S. Harlem Avenue) has been in business for 63 years! The store is filled with lamps--all designed by the owner and custom made at the location. It was refreshing to see someone who has so much passion and pride in his work.
Here is one of the photos from the session:
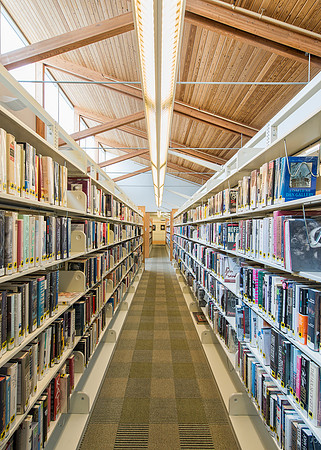
Close to HomeSome of my favorite subjects to photograph are the closest ones to my home! Today was not a great day for outdoor photography. It was cool, rainy and the wind was gusting at 30 mph most of the day. So, I visited a nearby indoor location...the local library. Here's one from today's visit to the Orland Park Public Library. Nikon D800, 0.3 seconds, f/11, ISO 100
D800 as a Tilt Shift ToolWhen taking architectural photographs, I strive for straight lines. Getting the lines straight in camera is even more critical when dealing with an ultra-wide focal lengths (e.g., 14mm) or distracting distortion may result.
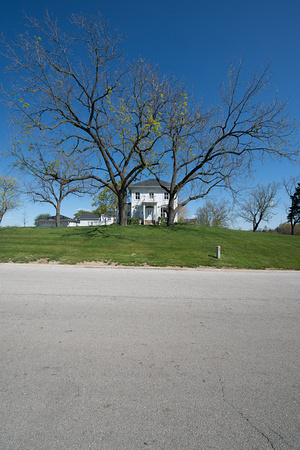
The cropping capabilities of the D800 allow me to achieve straight lines at the time of capture without necessarily having to purchase expensive tilt-shift lenses. Following is an example of how I applied this method while capturing an image of a historic farmhouse which was built in 1834 in Palos Park, a southwest suburb of Chicago.
This next scene is straight out of camera. For this image, my objective was to place the top of the tall trees within the frame while keeping the farmhouse straight. If I attempted to get the top of the trees into the frame by tilting the lens toward the sky, the farmhouse would no longer be straight--it would look it was falling backwards. Instead, I positioned the lens so that it was perfectly level to the horizon and then backed as far away as necessary to keep the trees within the frame.
As you can see, the downside to this approach is that I am losing much of the lower portion of the frame as nearly half of the photo would end up getting cropped away to achieve a reasonable composition! Before I started shooting with the D800, I would end up with small file sizes (no larger than 6 MP) when using the method. However, when starting with the enormous file sizes offered by the D800, I now end up with a much larger file size after cropping.
Here is the same image after cropping. This file is 4,200 x 4,200 pixels--larger than a full sized file from my D700!
 Finally, here's the finished photograph after converting it to sepia using Nik Silver Efex Pro 2 software:  Some may wonder why I don't correct any distortion during post processing. If the distortion is within certain limits, I often use the Perspective Crop tool within Photoshop CS5 to straighten lines. But, when the degree of distortion is more dramatic, using post processing tools to correct the distortion can severely damage image quality. It's best to not move pixels around very much during post processing if the goal is to preserve image quality.
Taking the Zoo out of Animal PhotosOne of my favorite locations for photography is the Brookfield Zoo. The Brookfield Zoo is filled with fascinating subjects. And, many of the exhibits are quite large, feature natural environments and clear of obstructions (e.g., bars, windows, cages). In many exhibits, moats are used to separate the animals from the visitors. Also, the Brookfield Zoo encourages photography: permitting tripods, allowing flash in some of the indoor exhibits and hosting an annual photo contest!
When capturing photographs of animals at the zoo, my goal is to eliminate any evidence that the animal is in captivity. I try to accomplish this by carefully studying the background throughout the entire frame and changing my perspective when necessary to manage the background elements. Another common technique is to use a very narrow depth of field to blur the background. Many of my zoo photographs are captured with the lens wide open (i.e., with the lens set to its widest aperture).
Earlier this week, I captured a photograph of a peacock at the Brookfield Zoo. By getting close to the bird and using a very narrow depth of field, there is no indication that the picture was taken at the zoo. The downside to this is that most of my zoo photos are closeup portraits that lack a sense of the surrounding environment. For environment photographs, I plan to visit Yellowstone National Park in the next year or two!
The following photo was captured with the D800, 500 VR, f/4 (widest aperture), 1/500th, ISO 160:
D800 and Cropping CapabilitiesI received my D800 a couple of days ago...and the thing that strikes me as most advantageous so far is the ability to crop a high resolution image when necessary. Here's an example of a shot from yesterday:
This image was a quick grab. I noticed the African Wild Dog beginning to open its mouth, so I turned and quickly captured this image. The shot isn't particularly well composed. And, I couldn't zoom in any closer as I was using a 500mm prime.

I then cropped the image for what I hoped would be a stronger composition--making my subject larger and focusing more attention on the subject and his teeth! This isn't the greatest photograph even after cropping...but my intention is to show the power of a larger file.
After cropping, I still ended up with an image that measured 4,736 x 3,789 pixels. That's more pixels than a full sized file from my D700!
Of course, it's best to compose the photograph properly right from the start in the camera. But, when that's not possible, it helps to have this added flexibility after the fact during the post processing.
My Choice: Nikon D800Nikon has announced two (actually, three) exciting new cameras: the D4 and the D800 (and D800E version). All three cameras are outstanding. I chose the D800 as I think it suits my style of photography the best.
I've enjoyed shooting with my Nikon D700 for the past three years. I expect the D800 to improve upon the D700. The D800 will offer files sizes that are three times as large--which will provide higher resolution and more cropping flexibility. The new camera should retain the same low light performance as the D700. I also expect that the D800 will have improved auto-focus capabilities--especially when used with teleconverters
One drawback of the D800 is that it requires careful technique. This shouldn't be an issue for me as I tend to use a tripod and cable release for most of my pictures. Unfortunately, the Nikon vertical grip and Kirk L-bracket isn't available right now--so I'll be hand-holding the camera for the near future. In fact, I'll probably continue shooting with my D700 for the upcoming weeks.
The D800 also offers incredible video performance. My interest is almost entirely in still photography, so I doubt that I'll utilize the video capabilities of the camera very often.
I struggled with the decision between the D800 and D800E versions. Ultimately, I took Nikon's advice and ordered the regular D800 version. Although the resolution might be a tiny bit less than the E version, the risk of moire is reduced. The regular version is more appropriate for a wide variety of subjects--which describes my photography.
My Nikon D800 is scheduled to arrive on Tuesday. I'm anxious to play with the new camera! |
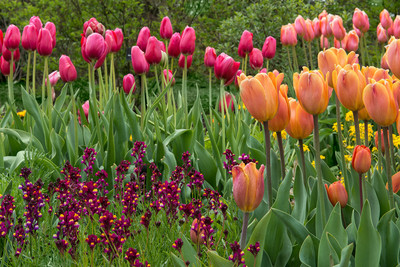
 The Nikon D800 offers a few features which makes it easier to compose and focus the camera when it is positioned so low. First, there's the Virtual Horizon feature. This feature makes it easy to ensure that the camera is positioned perfectly level. Then, there's Live View. Live View lets you compose the image using the LCD screen on the back of the camera without having to carry a right angle viewfinder. You can also use Live View to focus the lens more precisely (while zooming into the image) than a right angle viewfinder would allow.
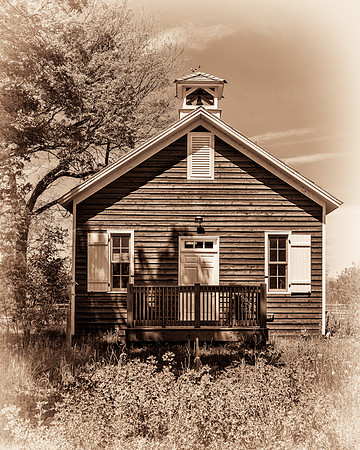 and The New
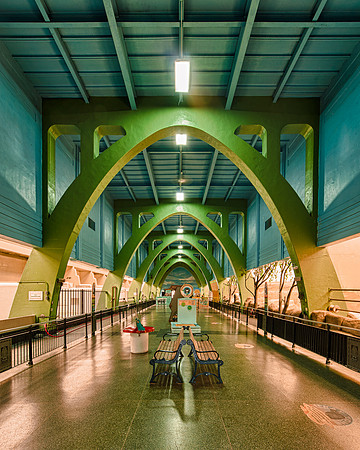 2: Next image from just inside the doorway a few feet back
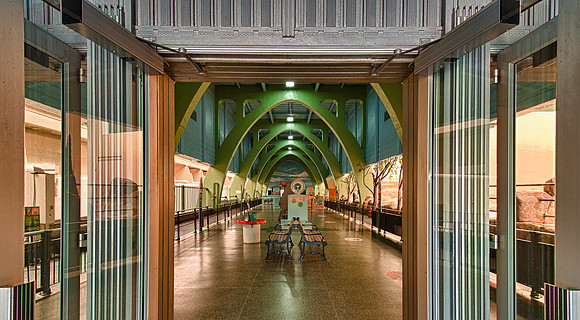
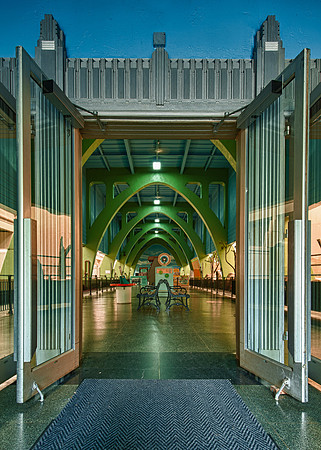 4: And, a few more feet back
 One way to analyze the Nikon D800's resolution capabilities is to view an image using a 100% crop. The following picture displays a portion of the above image at the pixel level detail. The crop represents just a tiny section of a distant portion of the image near one of the chandeliers:
 You can even read the price tags hanging from the chandeliers in this crop. Given the prices of some of the items, I'm thankful that I didn't knock any fixtures over while dragging my tripod and camera gear through the store!